![]()
Sponsored By
ROCK
HARDWARE
| Ben Nevis, Mt Cole National
Park [ Climbs | Images | Map | Forum | Trip Reports ] |
|
||||||||||||||||||||||||
 Ben Nevis is a mountain nestled in the Mt Cole
National Park south-west of Avoca. (See approach
map). It offers three distinct cliff faces, Red
Rocks, North Cliff and Centre Cliff. The
rock is a smooth, finely grained dark granite, more like Arapiles
sandstone to touch than the harsh granite of Buffalo.
You'll need good weather, route finding skills and a sense of adventure to
tackle the run outs. If this is your first visit I suggest you head for Red
Rocks, which has
the tallest climbing and easiest access.
Ben Nevis is a mountain nestled in the Mt Cole
National Park south-west of Avoca. (See approach
map). It offers three distinct cliff faces, Red
Rocks, North Cliff and Centre Cliff. The
rock is a smooth, finely grained dark granite, more like Arapiles
sandstone to touch than the harsh granite of Buffalo.
You'll need good weather, route finding skills and a sense of adventure to
tackle the run outs. If this is your first visit I suggest you head for Red
Rocks, which has
the tallest climbing and easiest access.
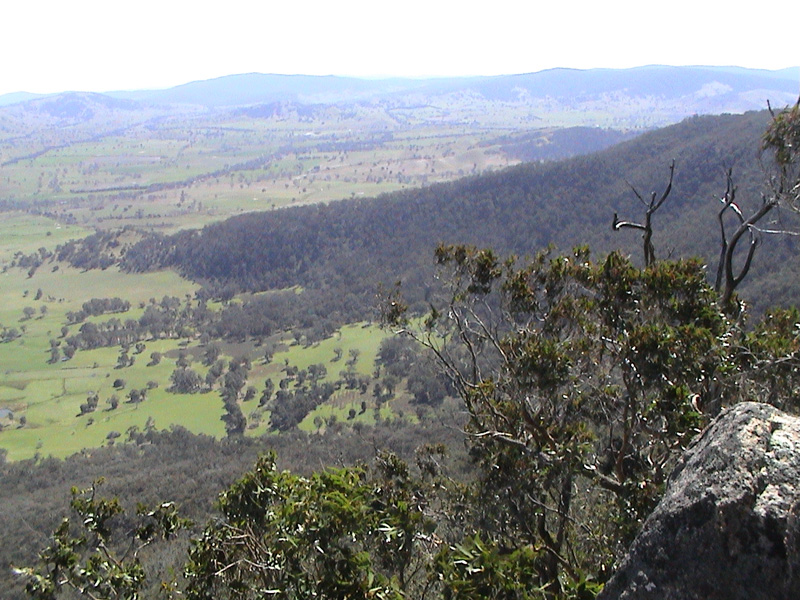
Right: Ben Nevis viewed from the road. Red Rocks is the rightmost cliff. There are climbs at the leftmost cliffs too (North Cliff & Centre Cliff). These are accessed via the summit lookout picnic area.
There are several ways to drive in via the forest tracks, some of which may not be suitable for the family sedan if it's very wet, though I haven't been bogged yet in the camry. Driving down from Bendigo head to Avoca, and circle around to Amphitheatre, Elmhurst, turn left to Eversley, Warrak, and on into Mt Cole park on the main Mt Cole road, which quickly leaves the bitumen as you enter the forest. From Melbourne or Ballart you'd find Warrak, via Beaufort. (See approach map). 7km of winding dirt road (watch out for wallabies they are everywhere!) leads to a left turn onto McGuiness road. Turn left again down Ben Nevis Road and keep going for a while. Eventually you'll find a another left turn down a track in which the road quality drops off considerably. Take this to go to Red Rocks. Had you continued straight, you would very shortly have come to the fire tower and picnic area of the North Cliff. At the red rocks car park, walk to the hang glider slab, then scramble right, along the cliff top.
Red Rocks ![]() (Access: 5 Mins walk + 3 raps)
(Access: 5 Mins walk + 3 raps)
The first thing you'll notice about Red Rocks (pictured
right), after you battle the confusing forest tracks to get there, is that
it's a bloody long way down to the base. Yep,
150 metres straight down. And the easiest way in is to do three 50m
abseils. The second thing you'll notice, or rather fail to notice is where
in the hell the first rap chains are. Study the guidebook pictures, read
the access notes, but in the end, if this is your first visit, you'll need
to nose around the cliff top, scrambling along the precarious
"track" on the brink of that big drop off, and look for a free
standing boulder about the size of a fridge (circled in red below). Its a ways down and right
from the initial plateau by the car park. Under the boulder, only visible
if you're climbing up to it (or you're an eagle), are the first set of rap
chains. If you still can't find the rap chains, check out this brief mpeg
![]() video
clip (2 meg, 33 seconds).
video
clip (2 meg, 33 seconds).
It takes 3 full rope length raps to get down. If the weather looks
like rain (or blazing heat), many parties will fix the abseil lines
(assuming you have three spare ropes), allowing for a "quick"
exit via ascending the ropes back up. (ie, bring your prusiks, ascender,
GriGri or whatever). This eliminates the need to lead a three or four pitch route
just to get out. There is a method of walking in & out, but all
accounts I've heard indicate that it's horrendous.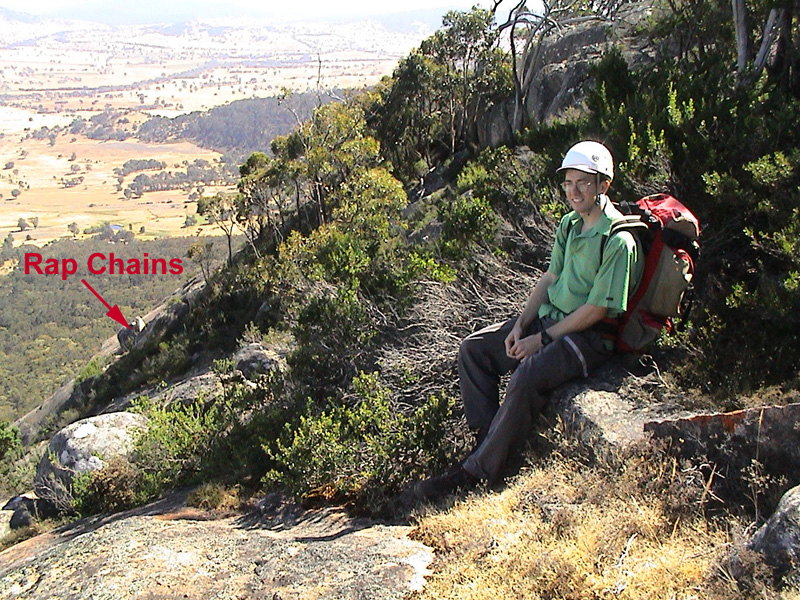
Left: Fellow climber Ben pausing to take in the view. The first set of rap chains is under the boulder indicated in red in this picture.
Now if that intro wasn't enough to provoke thoughts
of epic struggle, add the area's infamous runouts into the mix and you'll
be well on your way to a grand adventure. A lot of the lines require a
mixture of bolts and trad gear, but, and it has to be said, there are many
routes where you'd trade your left nut for a bolt. (hehehe). Now I don't
want to put you off, because in all fairness there are some superb lines
to climb, on rock that is just delightful to touch. Not as harsh as Mt
Buffalo granite, not as slippery smooth as polished Arapiles sandstone either. Beautiful waves of ripples, and long aesthetic
routes.
 Its
just that when the last bolt was 15 metres below and a scan of the terrain
ahead reveals no hope for additional pro, you might be excused for
pondering what brought you here in the first place. Arh, that's right -
adventure!
Its
just that when the last bolt was 15 metres below and a scan of the terrain
ahead reveals no hope for additional pro, you might be excused for
pondering what brought you here in the first place. Arh, that's right -
adventure!
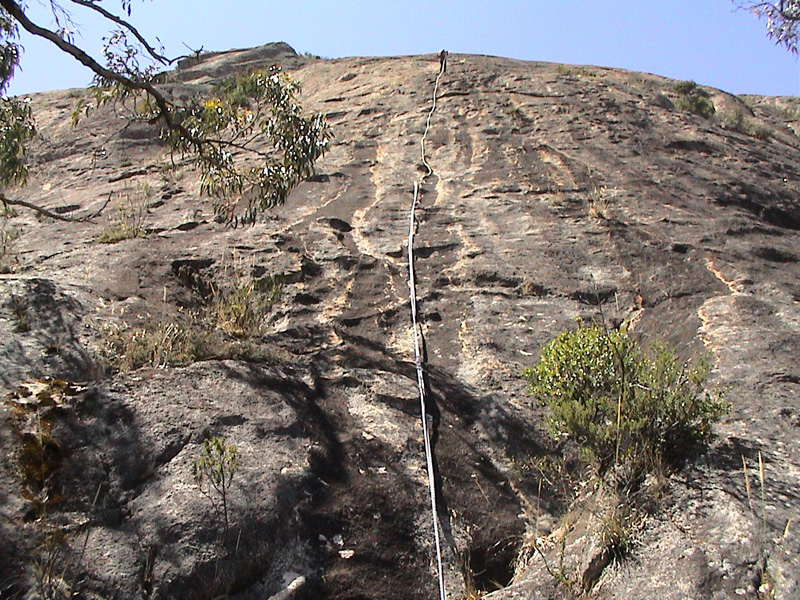
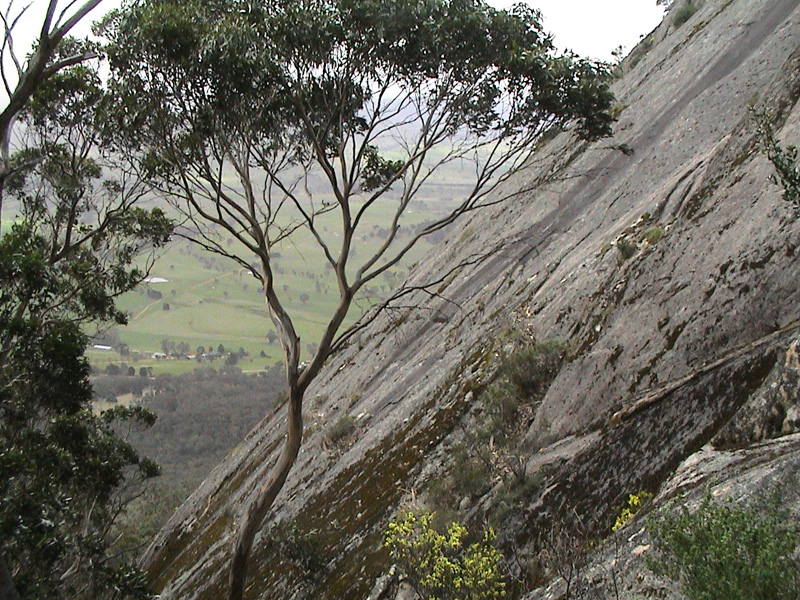
Right: The final abseil over rippled rock. The black streak is a route well worth doing, (Peeping Tom 182m, grade 16), but like most lines there, put bolt hunting on your skills list. If you're going to lead a route as an exit for the day, this is a good choice.
There are numerous routes to the left and right of
the final descent shown in this picture. More than once I've dreamed of a
60m rope, but you can get by with a 50. About 15 metres to the right of
the final descent, and up a little ways is a shinny new fixed hanger
marking the start of a recently established line ("Closer To
Fine", 130m, Grade 17), that I lead the other
day. It heads up to the big
scoop you'll see on your right (assuming you abseil facing the rock), as you are descending. The opening moves of
the first pitch are probably the hardest, and there is a runout to the
scoop where a natural belay can be constructed. An exciting lead.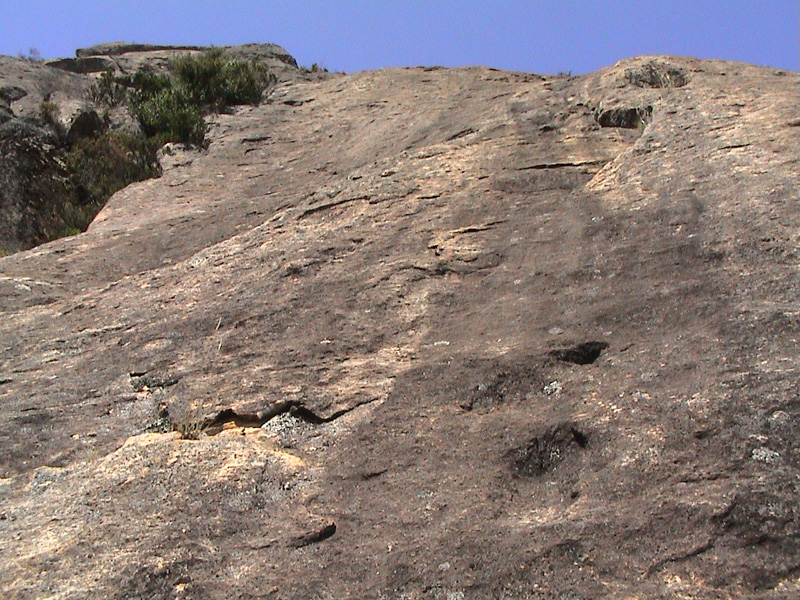
Left: Looking up from the ground, a few metres to the left of the decent line. Yasser 150m, grade 14 & Endless Summer 150m, grade 18, both start from here.
A few metres to the left of the descent line, just
before you get to a wide vegetated crack (pictured left), there are a
couple of lines worth a look. "Yasser" 150m, grade 14 is
probably the nicest. And "Endless Summer" 150m, grade 18 is also
choice. It's possible to do the first pitch of Yasser (easy warm up to
bomber, double bolt belay), and then move across and do the, crux, 2nd
pitch of Endless Summer which involves delicate slabbing, just to the
right of the vegetated gully. The moves up to the bolt are somewhat
runout. However, be warned when combining P1 Yasser with P2 Endless Summer
- you'll wish you had a 60m rope for this stunt, and the finish of P2 on
Endless Summer thirsts for pro.
 I
had this problem on my last visit and ended up doing a scary traverse in
search of a belay.
I
had this problem on my last visit and ended up doing a scary traverse in
search of a belay.
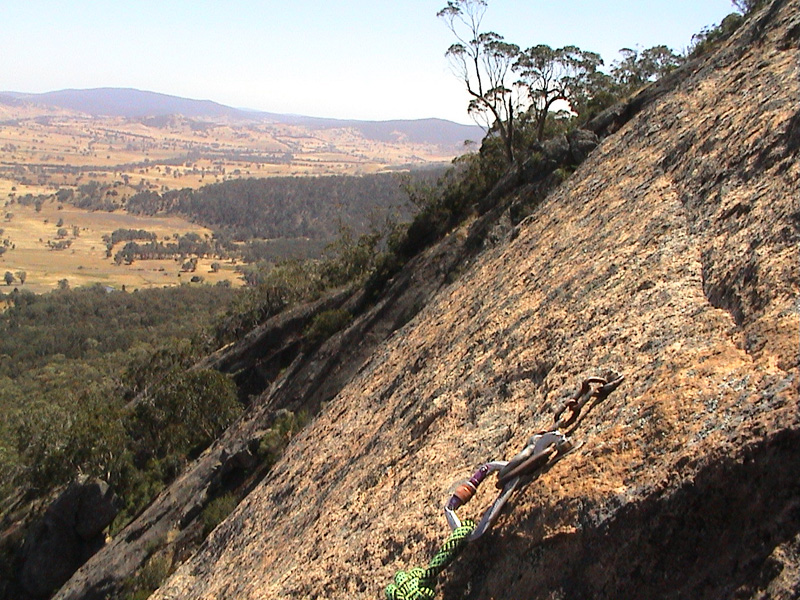
Right: View from the second set of rap chains, on the standard abseil descent. You're looking towards the rock over which Yasser & Endless Summer travel.
Red Rocks offers numerous other routes well worth a look, including a three star grade 20 "Living On The Edge" which I'm itching to try next time. It's an amazing place with many a bold lead. If you're schedule is tight, remember to leave plenty of time for the descent, and for packing up and getting out. Even if you don't get much climbing done, it's quite an adventure just abseiling in. Good luck.
North Cliff ![]()
 (Access: 25 Mins, No Track)
I suggest you fully explore Red Rocks before venturing across to the North Cliff of Ben Nevis. If your first visit to the mountain includes climbing on the North Cliff you'll likely be put off the whole area by the horrendous descent gully access and difficult route identification. I've climbed here on days when it's been too wet to climb, to hot to climb and recently too windy to climb. Basically if you have perfect weather, ample time on your hands, and don't mind a getting a workout just on the approach, then you could be ready to enjoy some of the quality routes on the North Cliff.
Right: View from the North Cliff summit. It's possible to see the Grampians in the distance a little to the left of this view point. Below Left: Lovely Ann, 94m grade 12 viewed from the crippling descent gully. The route takes the prominent black streak.
 To gain access, drive in as for Red
Rocks, but on the last turn, instead continue straight on to the
picnic area near the fire tower. Park at the tower, and follow the power
lines in a westerly direction along a little track. Very quickly you'll
come to a mossy low angle slab on your left which leads to the
aforementioned horrendous decent gully. Do not go down there with a full
pack of unnecessary junk. I suggest racking up at your car and heading off
with the intension of leaving nothing at the base. Slither and hack your
way down. Initially there is no track, but a zigzagging footpad of
sorts is revealed after a while. As you descend the centre cliff will rise
on your left and the north cliff of your right.
To gain access, drive in as for Red
Rocks, but on the last turn, instead continue straight on to the
picnic area near the fire tower. Park at the tower, and follow the power
lines in a westerly direction along a little track. Very quickly you'll
come to a mossy low angle slab on your left which leads to the
aforementioned horrendous decent gully. Do not go down there with a full
pack of unnecessary junk. I suggest racking up at your car and heading off
with the intension of leaving nothing at the base. Slither and hack your
way down. Initially there is no track, but a zigzagging footpad of
sorts is revealed after a while. As you descend the centre cliff will rise
on your left and the north cliff of your right.
Even armed with the guidebook diagrams and topos,
you'll be hard pressed to find the start of the routes. However, The one
line that should be clear is "Big Ben", the three star, 110m
grade 18. It's a long way down on the North Cliff, but is identified by a
step-like fault line that begins on a large treed ledge at the base and
continues (slightly right trending), onto the slabs above. The
"steps" are about the size of your hand and harder to climb than
they look. The first pitch (40m), accepts numerous nut placements of
varying sizes, as well as the 9 carrot bolts, so it's not run out, so long
as you treat it as a mixed trad and sport route.

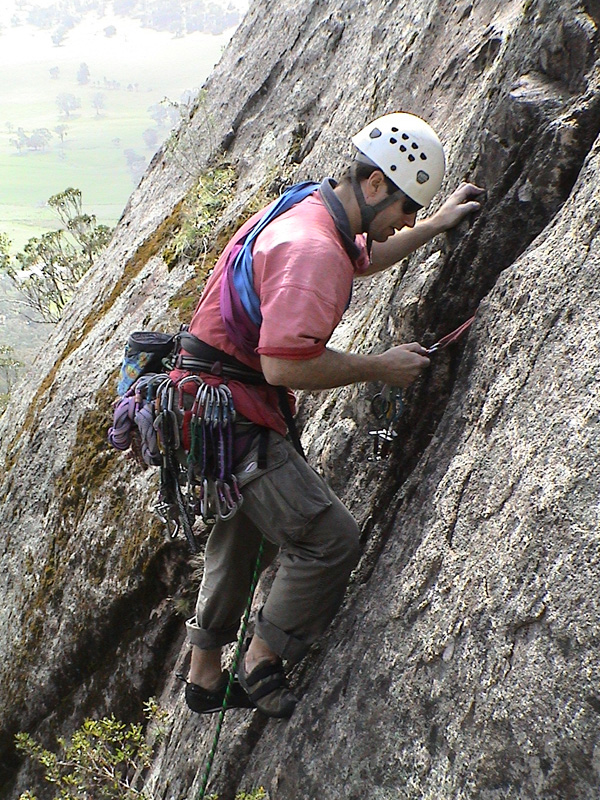
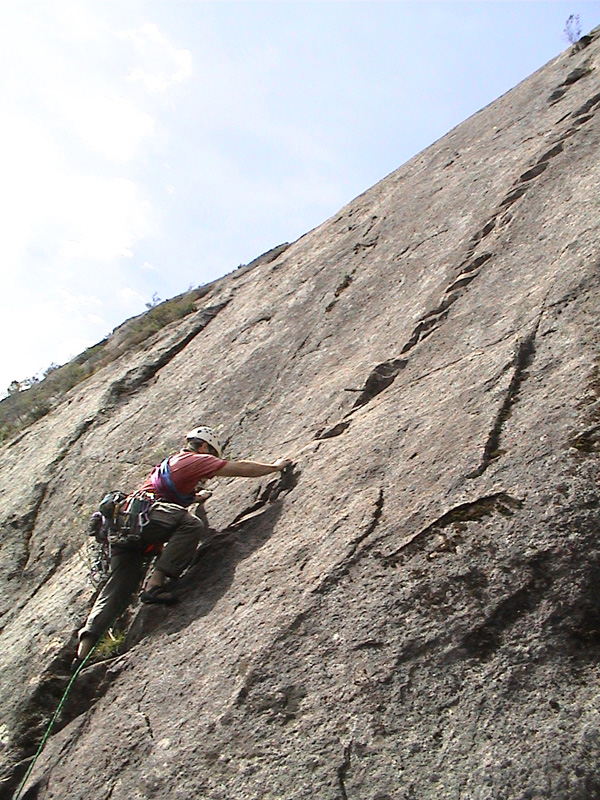
Above: Me leading the first pitch of Big Ben, 110m grade 18.
Note the "steps" leading off up the slab identify the route.
Check out this brief mpeg
![]() video
clip (1.7 meg, 27 seconds).
video
clip (1.7 meg, 27 seconds).
It's quality three star climbing, but on the day we were there a gale force wind arose, eventually causing us to rap off the top of pitch one. In the vicinity of the belay are three bolts, which can be equalised into a hanging belay - most uncomfortable, and not really suitable for a party larger than two. A small, shoe box sized ledge is perched to the left, but the single bolt above it means you can not belay from there without giving up your equalised anchor system. The route continues on a featureless right traverse and up a bolted slab. (See: Trip report).
|
|
Further Reading:
Northwest Victoria, A Rockclimbers Guide - A climbing guide book, edited by Chris Watson, Bill Andrews and Michael Hampton and available from local climbing shops, or the VCC.
Home | Guide | Gallery | Tech Tips | Articles | Reviews | Dictionary | Forum | Links | About | Search
Chockstone Photography | Landscape Photography Australia | Australian Landscape Photography
Please read the full disclaimer before using any information contained on these pages.
All text, images and video on this site are copyright. Unauthorised use is strictly prohibited.