![]()
Sponsored By
ROCK
HARDWARE
| The Horn Area, Mt Buffalo [ Back | Images | Forum ] |
|
||||||||||||||||||||||||
The Horn ![]() (Access: 10 mins)
(Access: 10 mins)
The Word:
Probably Buffalo's best beginner/intermediate area.
Sun/shade: Sun all day.
Wet weather options: No.
Style & Length of Climbs: 15-65m. Easier cracks, harder
faces and aretes. Take brackets plus a rack.
Grades: 12-29
 The
highest point of Mt. Buffalo. Drive to the end of the road, then wander up
for 10mins to join the hordes of tourists at the lookout. Draw admiring
glances as you pull the rope out and rack up, then glory in the oohs and
aahs as you casually leap the fence, set your helmet at a rakish angle and
smile for the cameras on your way down. A single 50m rope tied off will
get you down, but there’s only the one anchor (the fence!) so expect to
have your rope used by other climbers. Peroxide Blonde is easy to find,
not so much the other routes - first timers, bring your guidebook. The
Pintle is a 45m walk L round the bottom of the buttress.
The
highest point of Mt. Buffalo. Drive to the end of the road, then wander up
for 10mins to join the hordes of tourists at the lookout. Draw admiring
glances as you pull the rope out and rack up, then glory in the oohs and
aahs as you casually leap the fence, set your helmet at a rakish angle and
smile for the cameras on your way down. A single 50m rope tied off will
get you down, but there’s only the one anchor (the fence!) so expect to
have your rope used by other climbers. Peroxide Blonde is easy to find,
not so much the other routes - first timers, bring your guidebook. The
Pintle is a 45m walk L round the bottom of the buttress.
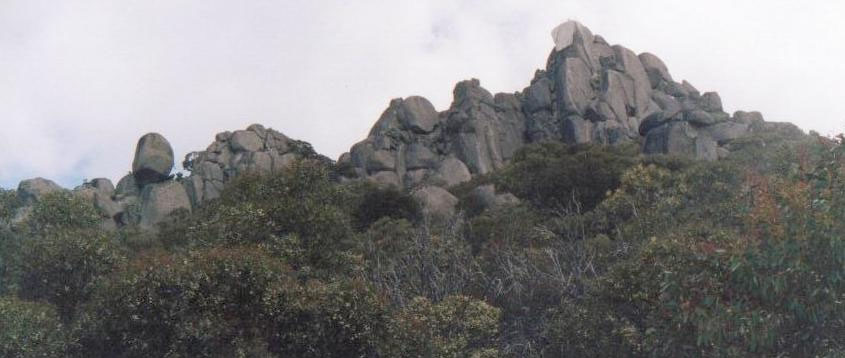
Above Right: The view of The Horn as you approach, with Peroxide Blonde following the high sharp arete just R of the bleached white patch of rock, and the Pintle L Hand Variant following the cracked arete below the bleached white patch of rock.
You can also walk down. There's a tricky chimney descent, jump the fence where the track goes under a large angled roof for 10m, with faint steps carved in the rock. But it's probably easier to walk from further W. Basically, leave the trail at the last point where you can drop down into some trees. Push through these for 20m then it's 130m of boulder hopping around the bottom. Either way, you'll end up quite low, below some small lower slabs. There is a groove you can solo up just down and R of Buttocks if you want do a route at the R end, otherwise continue round to below the Pintle, from where you can easily step back R to the base of Big Fun etc.
Buttocks 25m 10
Nice easy ramble up a groove with some footjams to remind you of Angels,
then pleasant easy slab L to belay at the base of HP (thread and cam).
* Hoi Polloi 20m 16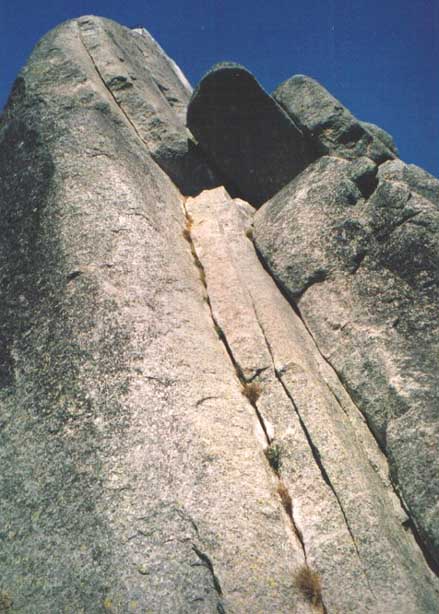

Lovely slabby arete. The tricky bit is past the 1st bolt, but it's
rather an easy tick for 16.
* The Pintle 70m 14
Excellent 1st and 3rd pitches with an ordinary looking crux pitch. 1) (**
20m 12) Start up the L of the 2 parallel cracks, past the odd tuft of
grass and plenty of good pro and pleasant climbing, constant at grade 12
or so. Belay under the overhang off a fixed thread and gear down in a
small flake/crevice. 2) Didn’t do. 3) (* 25m 13) Another good pitch up the
stylish crack at the back of the ramp, up the main face under the lookout.
Takes great wires and hexes all the way. Belay off the fence.
Above Left: Me on pitch 3. Peroxide Blonde is the obvious arete on the left. Above Right: A great view of pitch 1, also showing the superb line of The Pintle Left Hand Variant (the flake on the arete above).
*** The Pintle L Hand Variant 35m 16
Bloody excellent! An easy choice after you see the offwidth roof move on
the original! Step up L to ledge, below the little corner out on the airy
arete. Steep and smooth smearing and desperate laybacking to start is
protected by a stonker #5 hex. A gutsy reach off rounded laybacks gains a
good jam, then gear and off again up the brilliant little corner.
Sustained grade 15 climbing leads to the top of the corner and a few
microwires, then run it out 15m up the slab to the belay. Either downclimb/rap
down right to the 3rd pitch, or go round behind through a desperately
tight squeeze chimney.
Dreamworld ![]() (Access: 1 min)
(Access: 1 min)
The Word: Convenient, with a
couple of good-uns.
Sun/shade: Morning shade.
Wet weather options: No.
Style & Length of Climbs: 15m. Vertical routes on good
holds. Take brackets plus a rack.
Grades: 12-29
These are the obvious boulders 40m from the road, on your R as you approach the Horn. Park at the lowest end of the Horn carpark. Wander back down the road for 100m. The path, sometimes marked by a cairn, drops down the embankment and goes between the two biggest boulders. There's a little scrambling for the last 20m but it's still only a 3min access!
Buffalo Soldier 18m 16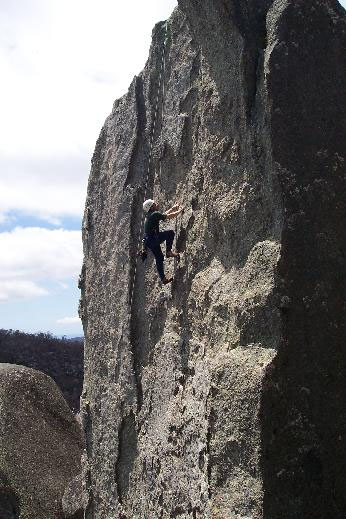
Dangerous lead. The moves are nice but the pro, while plentiful, is
marginal at best. Also there are several brittle holds which might come
off (one did for me!). Starts on the R side of the main face, 2m L of the
arete, at a thin flake. Goey up the flake (med cam or wire), then pleasant
moves on sharp holds past small wire to two threads (take thin tape). Step
L, then up and back R into the thin corner at the top of the face, step L
to avoid mantling on the loose top block. Rap chains.
Right: The photo to the right shows Ben halfway up. That arete to his R is 22, looks a bit bold with only 2 bolts and marginal gear between them.
Spaceman Spiff 18m 18
Starts 3m L of BS then veers R to join it for the finish. This would also
be a dangerous lead, but again is a very nice series of moves.
** This is Not our Land 18m 20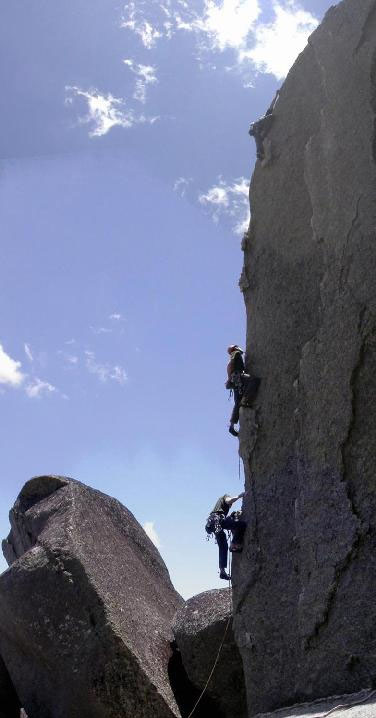
"19. Harder if you're short". Classic, but a solid 20, even if you're not
short! Follows the attractive dyke/flake up the L end of the main face, 3m
L of Ben in the shot to the R. (It's also visible in the R of the shot of
Injustice below). 3 bolts, 1 wire, and basically no rests! In spots the
dyke gives huge jugs, but then fuses to give bloody insecure laybacks off
tiny things, or big reaches. The brilliant final move is the crux, 2m
above a bolt!!
** Injustice 18m 22
Well actually a flash rather than an onsight cause I preplaced a sling
for the top section. Felt more like 21 to me. Up the arete at the L end of
the wall with numerous massive jugs separated by tricky litle moves. To
the R is one of Eddy's great composite shots of me at 3 stages of my
flash. Also notice the beautiful dyke/flake just to the R - This Is Not
Our Land goes up the L side of it.
Beware the Strathbogie 15m 12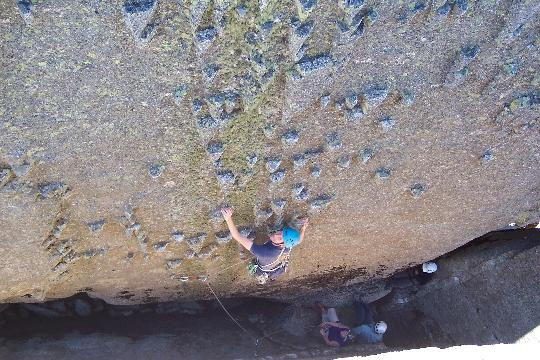
A bizarre feature with remnants of the dyke stuck on both sides of the
chimney! If you pushed the boulder back together they'd all fit back into
place!! Worth doing for the feature, if not the moves. Difficult
unprotected stemming to a committing step onto the juggy slab (not
recommended for a leader at the grade), then pisseasy slabby jughauling on
the dyke protrusions to the top (slinging the jugs for pro!). Descent is
an issue - there's no decent anchor, and the boulder is only about 30cm
wide on top! I suggest the leader haul in slack then rap down the back of
the boulder off your belayer's body weight (don't lower off, it'll trash
your rope). Then toprope your second up it and repeat the process. This'll
save both of you being on top at the same time and having to coordinate a
very cramped and dangerous simultaneous opposed rap. This shot shows Geoff
on the easy slabby juggy wall, just after the committing stemming start.
Backwall ![]()
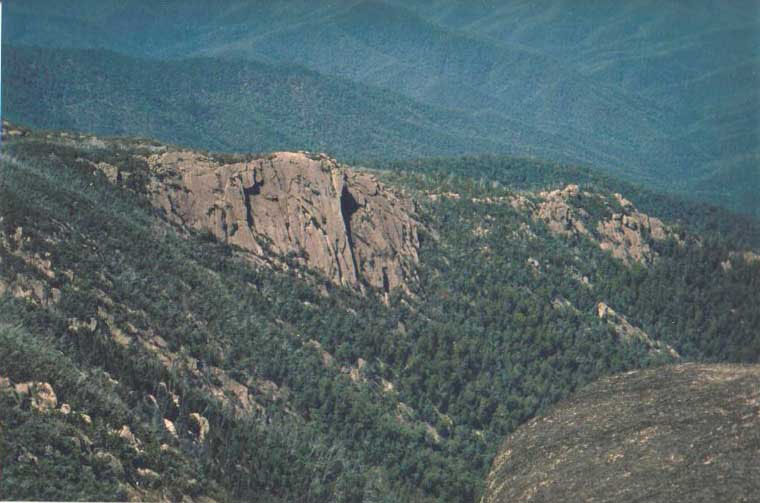
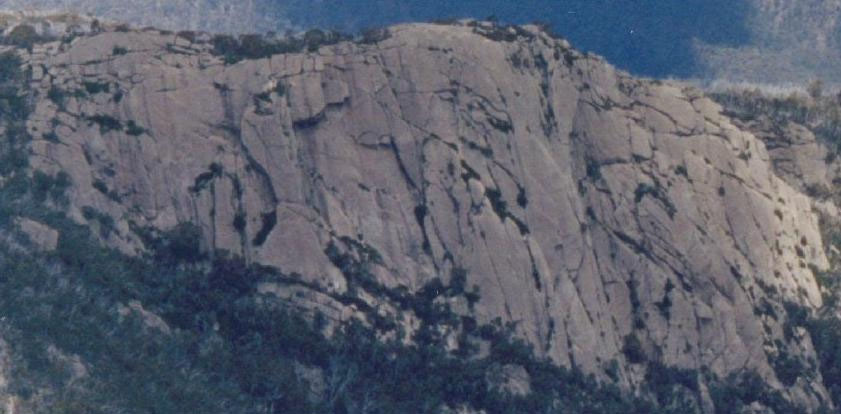
Above Left: The view of Backwall from the top of the Horn. Above Right: A
zoomed view of Backwall, showing those beautiful lines. Oh, and its up to
160m high, and there's less than 20 routes on the entire thing . . .
Further Reading:
Mt Buffalo, A Rockclimbers Guide - A climbing guide book, edited by Jeremy Boreham and David Breeton and available from local climbing shops, or the VCC.
Wills Climbing Page - Details on the Horn area and Dreamworld.
Home
| Guide | Gallery |
Tech Tips | Articles |
Reviews | Dictionary |
Forum | Links |
About | Search
Please read the full disclaimer before using any information contained on these pages.
All text, images and video on this site are copyright. Unauthorised use is strictly prohibited.