![]()
Sponsored By
ROCK
HARDWARE
| Summer Day Valley, Grampians [ Overview | Images | Map | Forum | Trip Reports ] |
|
||||||||||||||||||||||||
Possibly the most popular area in the Grampians, Summer Day Valley is a great spot for beginners, top ropers and guided groups with some harder lines, such as those on the Wall Of Fools attracting the more serious climbers. Nearby Mt Stapylton camping area is new and has running water and nice toilets. If you haven't climbed in the Gramps before this is a good place to start with easy access and nothing very tall or exposed. Beware the crowds though. Expect to find queues at the base of popular routes, and gang top ropers on sunny long weekends. Also, sometimes the army dudes Aussie rappel down the Wall of Fools and rig flying foxes across the valley. Often a target for VCC environmental clean ups, the area sports well maintained tracks and stone masonry at the based of some walls. If it gets too crowded just walk deeper into Hollow Mountain. All the routes require natural gear for protection, though some of the harder lines have a bolt or two.
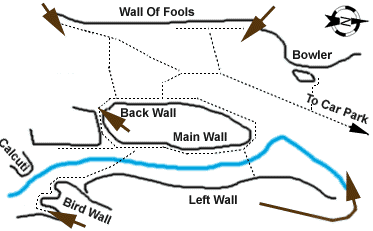
To gain access, head up the Western Hwy from Stawell and 11kms past Dadswells Bridge and take a left down "Wonwomdah" road labelled "Laharum/Wartook/Mt Zero/Halls Gap". (See: approach map). After 2.9kms go left down a dirt track. (You'll find the Mt Zero log cabins here for the camping impaired). Take the next right, and after the road winds around a bit you'll see the well established Hollow Mountain car park, including toilets. The walking track labelled "Rock Climbing Area" heads left into Summerday Valley. For a first visit, head into the valley and start on the left side confusingly called the "Back Wall" opposite the dominant orange Wall Of Fools. To access Stapylton campground, continue down the road past Mt Zero picnic area and follow the signs.
 The
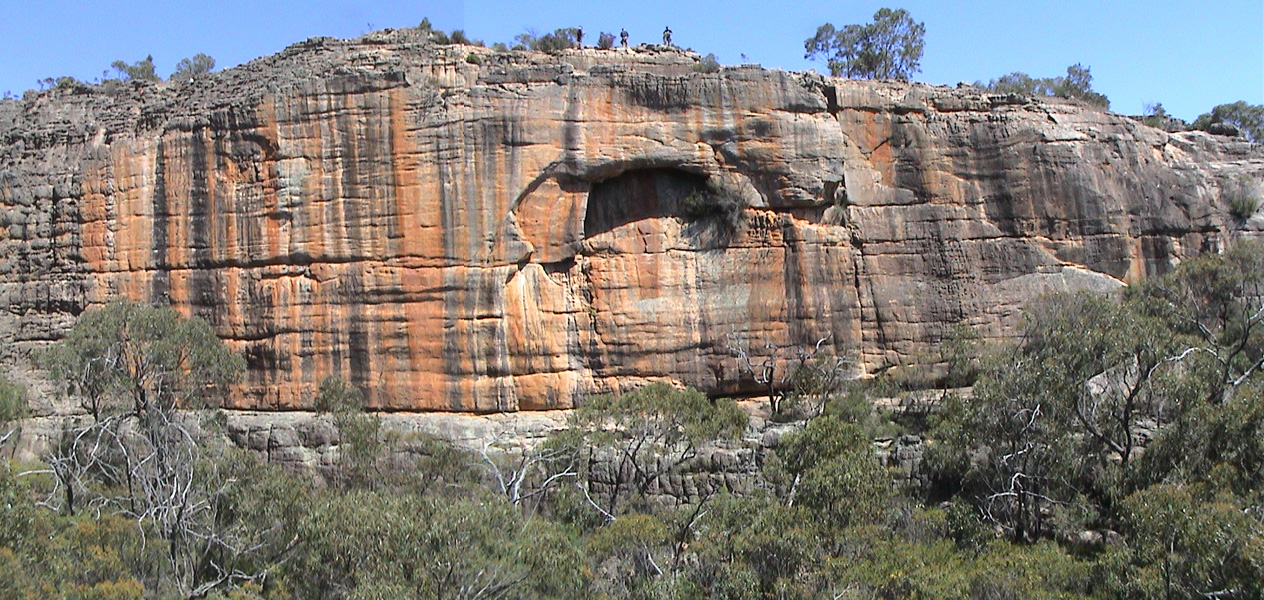
Wall of Fools dominants the valley, it's orange surface blazing in the
morning sun like a beacon to climbers of all skill levels. The big draw
card for hard core types is "Milupa" at grade 28, taking the
impressive overhanging roof that shadows the wall. Flying off the crux
roof moves you'll catch some air time. However, for most valley goers
something a little tamer is generally called for. Many of the routes go on
a mixture of bolts and natural gear.
The
Wall of Fools dominants the valley, it's orange surface blazing in the
morning sun like a beacon to climbers of all skill levels. The big draw
card for hard core types is "Milupa" at grade 28, taking the
impressive overhanging roof that shadows the wall. Flying off the crux
roof moves you'll catch some air time. However, for most valley goers
something a little tamer is generally called for. Many of the routes go on
a mixture of bolts and natural gear.
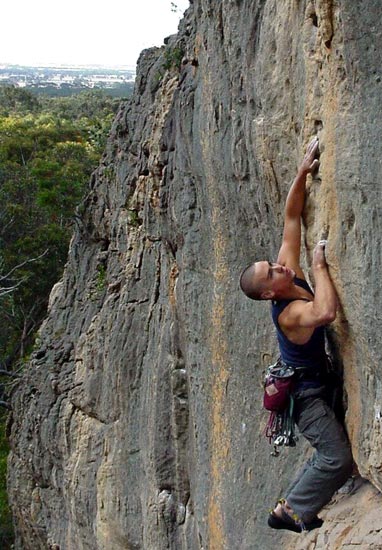
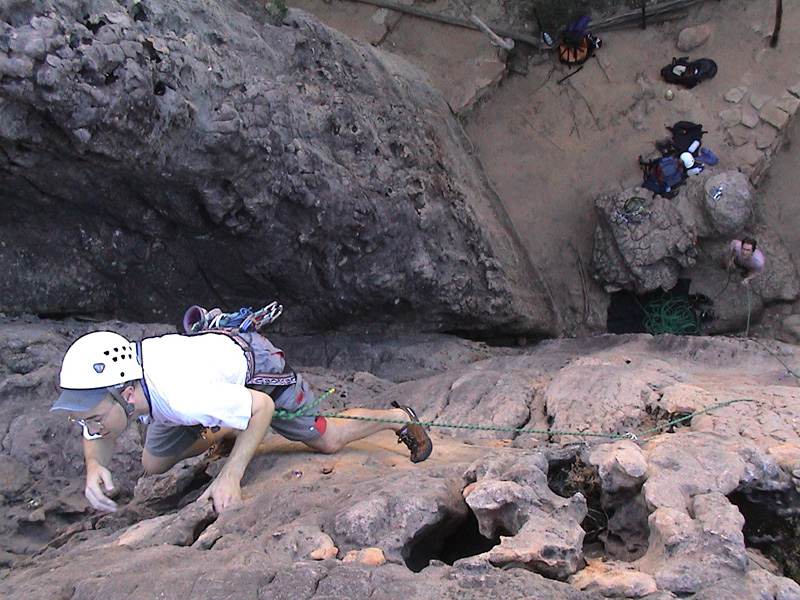
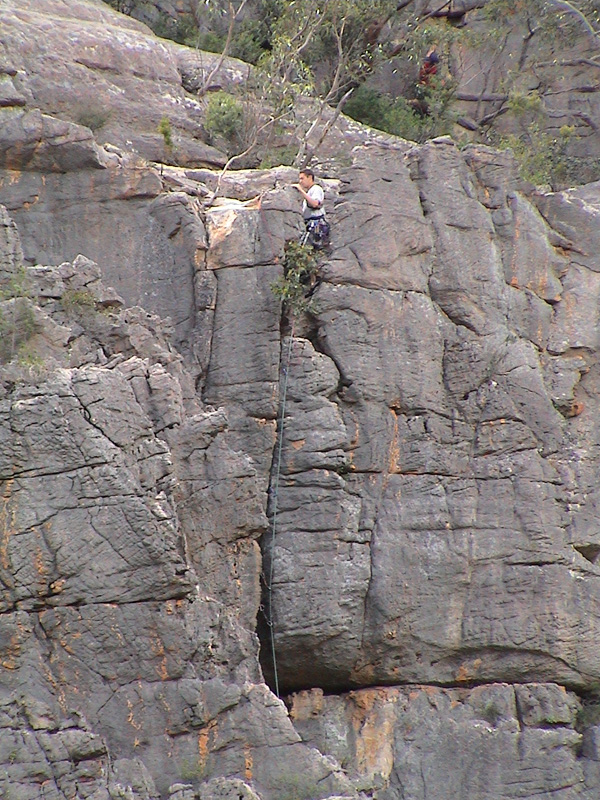
Right: Unknown climber leading Lofty Odours, grade 21 on the Wall Of Fools.
Check the
![]() Video Clip (3.4
Meg, 55 seconds).
Below: Major routes on the wall.
Video Clip (3.4
Meg, 55 seconds).
Below: Major routes on the wall.
You'll find "Flake Of Fear" the easiest grade 15 in the Grampians. The opening moves are probably the hardest, then it's a cruise to the top. The flake itself contains huge jugs and is reputed to wobble a bit, but that might be mostly imagined. Diazepam at grade 25, with three bolts protecting the upper crux is considered a choice climb. Next to it, Soweto at grade 21 is definitely a nice line, and easy to top rope if you don't fancy the small edges and tiny pro on lead. Handles at grade 7 is a very convenient new leaders route or beginners warm up, with loads natural gear.
| 1. Handles 17 | 2. Soweto 21 ** | 3. Diazepam 25 ** | 4. Innocent Fool 28 * |
| 5. Zero Blunder 28 * | 6. Milupa 28 ** | 7. Idiot Wind 24 * | 8. Lofty Odours 21 * |
| 9. Flake Of Fear 15 * | 10. One Little Piggy 19 | 11. Steve William's Route 24 | 12. Falla's Phallusy |
| 13. Armageddon Home 21 | 14. Mounting Disasters 19 * |
The most climbed piece of rock in the Grampians? For new comers to Summer Day the confusingly named Back Wall is generally where its at. Loads of short easy routes with quick top rope access provides almost gym like convenience. The environmental damage at the base of this wall is silent testimony to the volume of climbers that regularly congregate here. The masonry work has been installed to help decrease further erosion, additional paths and tree damage.
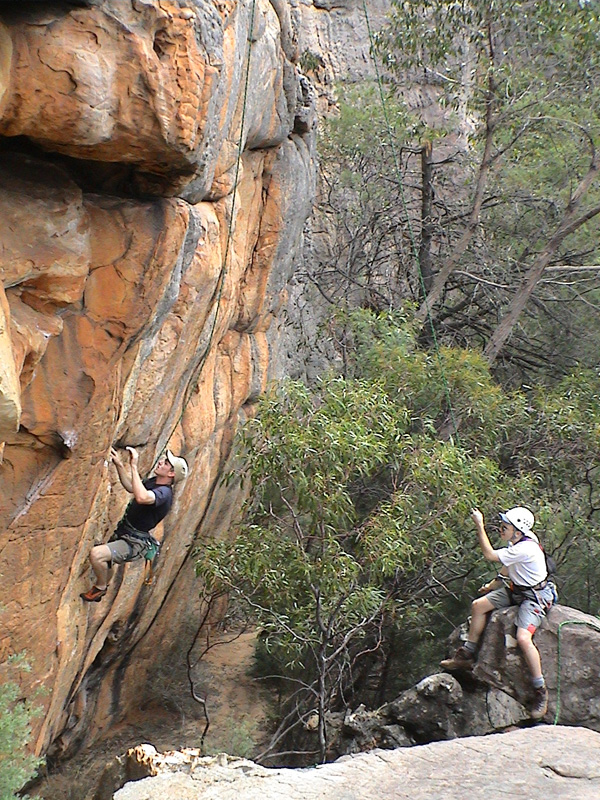
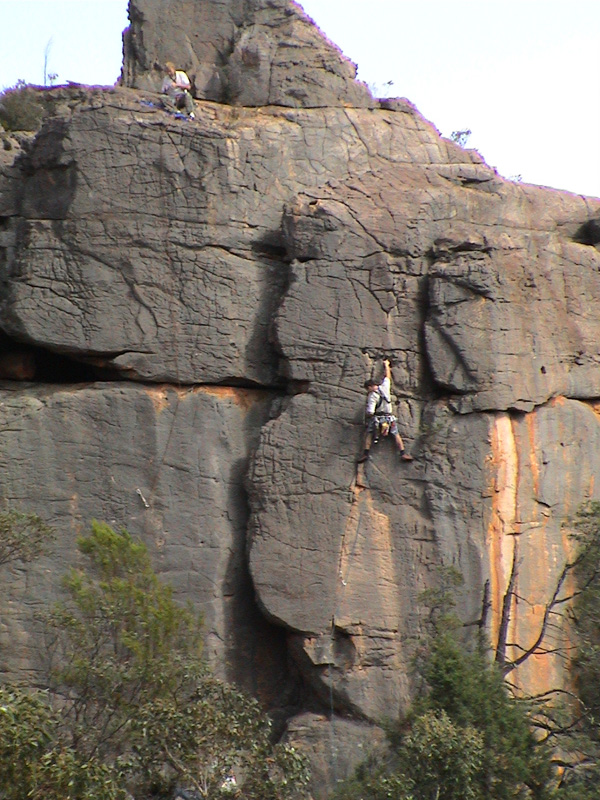
Above Left: Lee leading Overkill, grade 17, Back Wall. (Photo
by Neil Montieth). Above
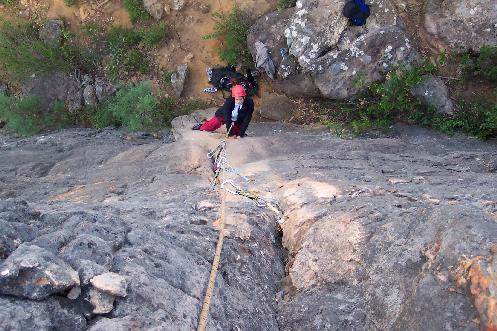
Middle: Top ropers mill below "De Blanc" grade 12. Above
Right: Ben leading "666" grade 17 on the Back Wall.
De Blanc (12) on the left of the wall is almost never without a rope over it. Left of it, The Lost Pleiad (18) and Regatta (13), and generally also taken by the same group. If you're quick, try and get on "Overkill" at grade 17 (pictured above left) right where the track meets the base. As a trad lead it's well protected and fun, with the crux move a nice reach/hop to a huge jug. Right of it, 666 also at grade 17 is harder to protect and has a tricky opening sequence. Left of the line Tootsie Direct (22) is a one move wonder and therefore a nice route to top rope if you're looking to break into that grade. Further right along the wall the terrain gets very easy with several routes under grade 10.
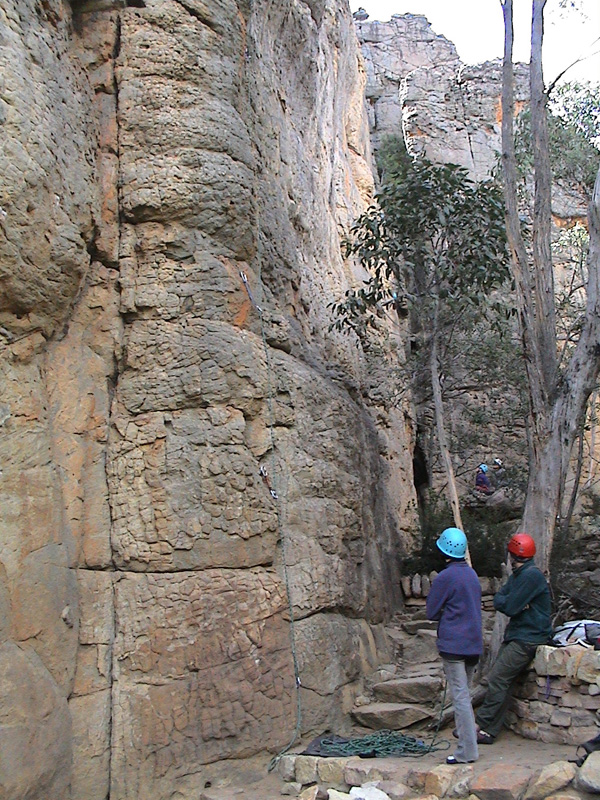
 On the opposite side of the Back Wall is,
confusingly, the Main Wall, hidden from the Valley proper. Here you'll
find a wealth of enjoyable routes. The ever popular Waxman (11) is a
classic warm up, with good pro and nice chunky holds. Rats Tail (16),
Texas Radio and the Big Beat (17) and Halfway Hotel (18) are all deserving
of their stars, and clustered side by side they offer lots of fun without
shifting your packs. Walking On The Moon (18) is supposed to be the best
line of this wall, but it's really quite serious so be careful. I'll mention Underneath The Arches (16) as having
harder opening moves than it looks. Fritz And The Cyclops, grade 24
(pictured below right) has a crux slopy lackback just above the horizontal
break at about mid-way. Three dimensional (22) on it's left is way easier
being just a pump jug haul.
On the opposite side of the Back Wall is,
confusingly, the Main Wall, hidden from the Valley proper. Here you'll
find a wealth of enjoyable routes. The ever popular Waxman (11) is a
classic warm up, with good pro and nice chunky holds. Rats Tail (16),
Texas Radio and the Big Beat (17) and Halfway Hotel (18) are all deserving
of their stars, and clustered side by side they offer lots of fun without
shifting your packs. Walking On The Moon (18) is supposed to be the best
line of this wall, but it's really quite serious so be careful. I'll mention Underneath The Arches (16) as having
harder opening moves than it looks. Fritz And The Cyclops, grade 24
(pictured below right) has a crux slopy lackback just above the horizontal
break at about mid-way. Three dimensional (22) on it's left is way easier
being just a pump jug haul.
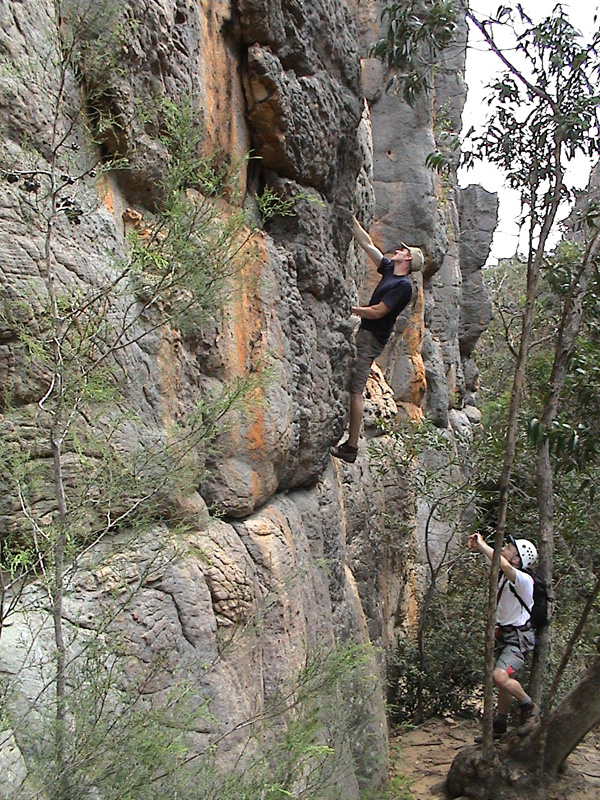
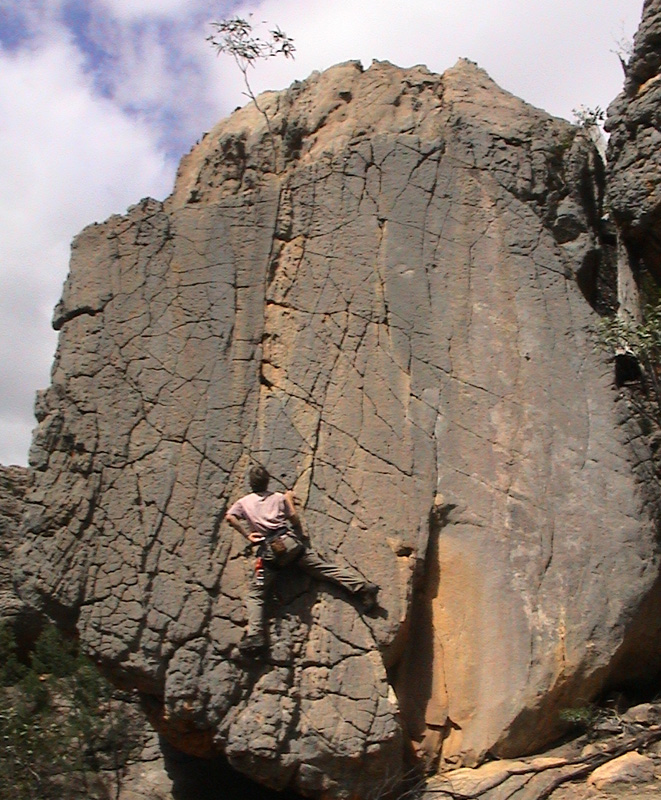
Above Left: Kent bouldering around on the start of Texas Radio
and the Big Beat, grade 17. Above Right: Kent top roping Fritz And The Cyclops, grade 24.
Three dimensional (22) on it's left is way easier.
[ Below: From Will Monks ]
** Waxman 25m 11
Excellent! A great warm up with brilliant pro - you have to love those
slots which take bomber gear anywhere from a #3 wire to a #11 hex! Step
off block and follow juggy right-leading flake, then over slightly blank
bulge to regain endless jugs, then steeply up the crack in nice airy
positions.
* Texas Radio and the Big Beat 25m 17
Really good, but loses a star for the bloody annoying scrambly shit at
the top. Up the crack 15m R of W, then step left to layback the great
looking corner. Careful with the rock - there’s some hollow flakes, and
the surface is a touch gritty/sandy. Here's me placing gear during the
cruxy layback section - which I subsequently tested by pinging off the top
of the corner, when a foothold disintegrated mid-layback.
* Halfway Hotel 25m 18
Good again, and loses a star again for the annoying exit! 8m R of TRatBB.
Good wire off the deck, then take note: it’s hard to get good gear through
the crux section at about 4-5m!! This section spits people off with
surprising regularity, with a good chance of decking (having seen people
on it twice, I've seen one grounder, and one fall to within 20cm of the
deck!) - so ask your belayer to pay attention, and to stand close to avoid
unzipping your gear. Up corner to ledge, then up short wall to bigger
ledge.
Opposite the Main Wall (and seperated from it by a gully) is the vegetated and lesser used Bird Wall. A recommened link up is to do Greenfingers (15), then arriving at the second tier head up Fantasm (16). You can descend down the gully from the base of the second tier.
Above Left: Bird Wall. Above Middle: A climber on Greenfingers 25m grade 15.
Above Far Right: Nic below the first hard move of Fantasm (16).
Photo By Will Monks.
[ Below: From Will Monks ]
* Fantasm
10m 17
The guide says it's a *** 18m 16 and is wrong on all counts! In fact, it's
18 if you go direct up the thin upper crack without using the face holds
2m to the left. It's a very nice little problem but just too short for any
more stars.
Bowler Boulder & Calcutti Crag ![]()
To the right of the Wall Of Fools the small outcrop of Bowler Boulder contains a few short but choice routes. Bowler at grade 15 is probably the pick, though Sharpville (19) is considered a test piece, and Hit and Run also worth a look. At the far end of the Main Wall resides a little boulder ambitiously refered to as Calcutti Crag. There is really only two routes here worth doing, namely Right Route (15) and Left Route (14).
Above Left: Unknown climber on Sharpville?, grade 19 at Bowler Boulder.
Above Right: Calcutti Crag.
Further Reading: ![]()
Grampians
Selected Climbs - Guide book authored by Simon Mentz and Glenn Tempest
and available from local climbing shops or the VCC.
Will's
Climbing Pages - Summerday Valley details and pics.
Home | Guide | Gallery | Tech Tips | Dictionary | Forum | Links | About | Search
Please read the full disclaimer before using any information contained on these pages.
All text, images and video on this site are copyright. Unauthorised use is strictly prohibited.