![]()
Sponsored By
ROCK
HARDWARE
| Lunar Crag, Grampians [ Overview | Images | Map | Forum | Trip Reports ] |
|
||||||||||||||||||||||||
[
This guide contributed by Neil Monteith. Disclaimer: Rock climbing is a
dangerous sport. None of the information contained in this document has
been verified. Treat all fixed gear with suspicion, route grades may be
incorrect and the rock may be poor. The editors of this document take no
responsibility for any injury arising from the use of this information. If
there are mistakes in this guide then let the editor know by emailing
nmoneith@yahoo.com. ]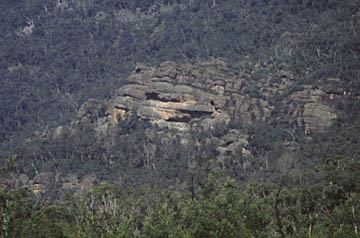
Drive 8.7km from Halls Gap along the Halls Gap/Mt Zero Road. Turn left into rough dirt road and follow this to T junction (4WD required). Turn left and drive approx. 300m along this road past a small creek crossing and park. If you don't have a 4WD take care when parking, the edges of the track are very soft and you WILL get bogged. Bush bash uphill following the pink tape markers for 10 minutes to base of Lower Lunar Crag. To reach the upper cliffs walk to far right of the lower cliff and upwards to obvious big red cave. If you don't have a 4WD walking time is approx 25min.
Camping
 There are three options when camping near Lunar
Crag. The most common and 'legal' is the official Plantation Campground
located about 500m north along Halls Gap/Mt Zero Rd. This area has
toilets, drinking water and tables. It also has camping fees.
There are three options when camping near Lunar
Crag. The most common and 'legal' is the official Plantation Campground
located about 500m north along Halls Gap/Mt Zero Rd. This area has
toilets, drinking water and tables. It also has camping fees.
The second option is to camp half way along the 4WD track which heads up
to Lunar Crag. There is a good flat space which is hidden from the view of
the road about 100m in from Halls Gap/Mt Zero Rd.
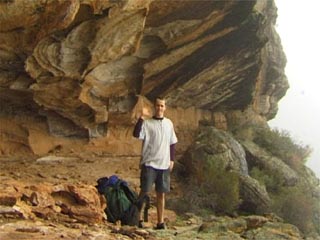
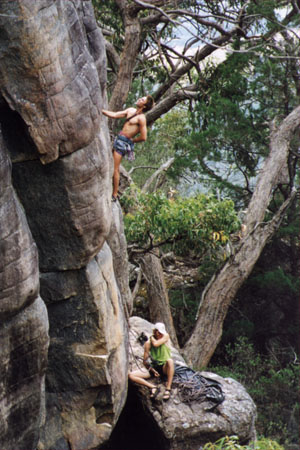
The final and most atmospheric is camping in the big red cave at Lunar
Crag proper. This cave can fit at least 10 people and is completely
weather proof with a fantastic view of the surrounding mountains. You may
be sharing with a few wallabies!!
Above Right: Neil Monteith in the camping cave.
Lower Lunar Crag ![]()
Pommy on the Moon 25m 20
Climbs the highest and nicest part of the lower wall. Up wide crack to
ledge. Up line in loose slab to nice orange rock. Climb right side of this
to big break (#4 cam) then crank up bulging thin line above on small wires
to top and tree belay. FFA Neil Monteith (onsight) & Mat Shears 7/6/98
Drifter 20m 22
80m left. Two move wonder, Up wall on edges to bulging smooth section.
Desperatly up this on small crimpers to juggy top. FTRA Neil Monteith
8/8/98
20m left is the obvious Arapiles Block which has four quality top-ropable
boulder problems all around grade 20.
Lunar Problem One 5m
Up on jugs to obvious big jug under roof. Step right and grapple sidecling.
Traverse back left on slopers to juggy finish. FTRA Neil Monteith 8/8/98
Lunar Problem Two 6m
Staright up to break. Get crimper then big dyno to good jugs. FTRA Neil
Monteith 8/8/98
Lunar Problem Three 7m
Up broken corner traversing left under bulge. Up to break then lunge up to
edges. Lunge again to jugs. FTRA Neil Monteith 8/8/98
Lunar Problem Four 6m
Hard start up sideclings to mini roof. Pull over this on edges then lunge
for jugs at top. FTRA Neil Monteith 8/8/98
Left Side Lunar Crag
![]()
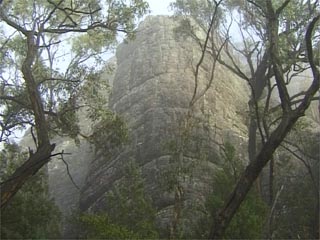 The first four routes are located on the obvious
tall buttress at right side of crag. A single FH backed up with SLCD's and
small wires services the belay on top.
The first four routes are located on the obvious
tall buttress at right side of crag. A single FH backed up with SLCD's and
small wires services the belay on top.
Right: The Apollo pillar.
Apollo 20m 10
Easy slab with good protection at the far right side of Left Side
Lunar Crag. Step off block and up to top of 'pillar' with a single FH for
belay. Downclimb the northern side of the pillar to decend. FFA Neil
Monteith (onsight) & Mat Shears 7/6/98
Private Universe 30m 17
Pleasant slab. Start just down left of Apollo at a small pillar.Up the
pillar, then continue up just left of the arête. FFA Wayne Maher, Melanie
McIntosh, James McIntosh, Peter Cunningham 29/12/98
* Lost in Space 30m 21
3m left. Thin face with two FH's. Hard moves are located in the bottom
half. The top half is technically easy but hard to protect. FTRA Neil
Monteith 31/5/98. FFA Paul 'NZ' Christoffersen (redpoint) & Nick 'Tarzan'
McKinnon 4/10/98
Lunar Lander 28m 18
Climb groove at left arete of the Lost in Space Pillar until about 8m
above the ground, step right then up the left edge of the wall. Attempted
by Nick McKinnon 4/10/98. FFA Peter Cunningham, James McIntosh, Wayne
Maher, Derek Vissor. 29/12/98
Falun Gong 20m 18/19
3m left. Diagonal crack in right wall of gully left of Lunar Lander.
The finish is dirty. FFA Chris Baxter & geoff Gledhill 25.11.2000
Capricorn One 25m 12
3m left. Marginal protection makes for engaging climbing. This is the slab
just left of Falun Gong. Start in the centre of this on a ledge below two
cracks forming a V. Climb cracks to a narrow ledge then slab (crux) to
another narrow ledge. Follow the flake then up slightly right to a larger
ledge with tree. FTRA 31/5/98. FFA David Jupp & Matthew Jones 6/11/2000.
The next climbs are ten metres left of Moonscape on a textured grey wall.
A rap station is situated above Sea of Tranquility.
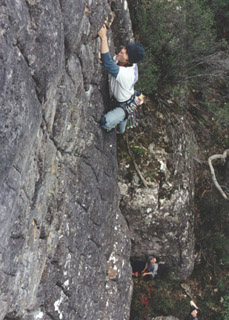 * Zero Gravity 20m 17
Surmount bulge at start then up to break. Hard moves in shallow corner
(FH) lead to a juggy overhang. Over this then upwards to belay ledge. A
sandbag at the grade? FTRA Neil Monteith 31/5/98. FFA Paul 'NZ'
Christoffersen (onsight) & Nick 'Tarzan' McKinnon 4/10/98.
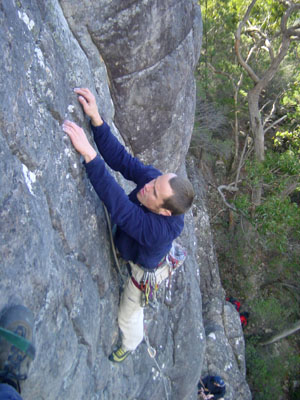
Right: Poul on the FFA of Zero Gravity (17).
** Moon Unit 20m 19
2m left. Start as for Sea of Tranquility but heads up and right to FH.
Up hard wall then twin seams above keeping left of Zero Gravity. A bit
contrived. FFA Adam 'Decker' Demmert (onsight) & Neil Monteith 4/10/98
* Sea of Tranquility 20m 19
Thin start with limted protection to break then more hard moves to
seam and jugs. Up reachy bulgy wall to rap station on ledge. FTRA Neil
Monteith 31/5/98. FFA Neil Monteith & Adam Demmert 4/10/98
** Crescent Crack 25m 20
3m left. Great seam and face on left side of the Left Side Lunar Crag.
From large block step across to crack and motor up this to blank section.
Over this (crux) then up to jugs. Into faint corner (FH) and up to break.
Step right and climb bulge and sloping face to top. Rap off anchors above
Sea of Tranquility. FFA Neil Monteith & Mat Shears (couldn't do crux)
9/6/98
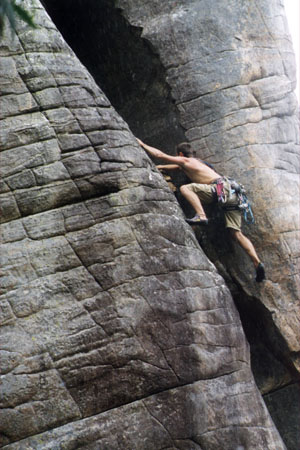
Above Left: Neil Monteith on his route Crescent Crack (20).
Above Middle: Thomas Wimmer repeats Crescent Crack (20). Above
Right: Neil Monteith on the FFA of Mercury (22).
** Mercury 22m 22
2m left. Tricky moves up the closed obvious corner for eight metres
then bridge up to roof passing a FH. Jam left across crack and around to
corner. Jam up this to top. Bring heaps of wires for this classic grunt
fest. The first half was aided at A1 by Neil Monteith 18/7/98. Nick
McKinnon attempted to free it 4/10/98 but didn't get off the ground! FFA
Neil Monteith, Poul Christofferson & Thomas Wimmer (GER) 6/2/99
Mercury variant 24m 22?
Instead of finishing out left, hand traverse out right along sloping break
to finish up Crescent Crack.
Abyss 15m 22?
4m left. The good looking diagonal hand crack. A chain will be needed
on ledge.
Far Left Side Lunar Crag
![]()
The following three routes are found on a black wall
about 60m left of Abyss.
Cosmonaut Flake 15m 18
Thin layback flake on ledge up and right of main wall. Finish up blocks to
tree belay. FFA Neil Monteith & Poul Christofferson 6/1/99
Terrorform 15m 18?
Slabby wall to small ledge then wall above.
Sputnik 15m 22?
Rounded arete on left side of wall. FH's?
* Eclipse 25m 21
40m left of Sputnik is a small creek. The next route is on the wall on the
right side of the creek. On the left side of the wall. Up overhung start
on jugs to FH. Tricky balancy moves on crimpers leads to second FH. Step
left onto arete and crimp up on layaways to good holds. Upwards to sloping
ledge (cams). Surmount overhang on jugs to ledge. Up over next overhang on
limited protection but excellent rock. FTRA Neil Monteith 8/8/98. FFA Neil
Monteith & Adam Demmert 4/10/98
Meteor Attack 10m 21?
The next route is on the small wall on the left side of the creek.
Overhung start, hard, to break. Long move to next break. Up on crimpers
and pockets to top
Upper Lunar Crag ![]()
Several hundred metres above the red cave is a two
tiered wall. From the road it would proberly take close to an hour of
technical scrambling to reach it. The lower right hand side has the better
rock. It is easily distinghed by the 'fin' of pocketed rock located in the
middle of the cliff. The upper tier of Upper Lunar Crag looks promising
from the road but is generally much to juggy or loose to bother with.
Fin 20m 18?
The obvious route up the arete made by the fin. Some very intersting small
pockets down low. FH's?
Overhung Face 20m 22?
Bouldery start up soft rock 30m left of Fin then up face.
Further Reading: ![]()
Lunar Crag - Neil Monteiths web site, for more pics and latest
updates.
Home | Guide | Gallery | Tech Tips | Dictionary | Forum | Links | About | Search
Please read the full disclaimer before using any information contained on these pages.
All text, images and video on this site are copyright. Unauthorised use is strictly prohibited.