![]()
Sponsored By
ROCK
HARDWARE
Friction Knots
The Prusik Knot
The good old prusik knot is very, very useful. All you need is a loop
of cord which you can make using 6 or 7mm accessory cord and a double
fisherman's knot. With one or two prusiks you can ascend a
rope, or rig a z-pulley to haul up an
injured climber, or backup an
abseil. Suffice it to say
it's worth learning this gem of a knot. There are numerous variations on
the prusik such as the "autoblock", but follow these steps to
tie the standard prusik knot:
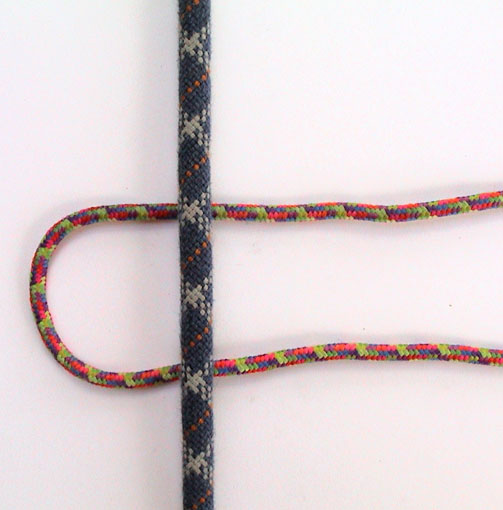
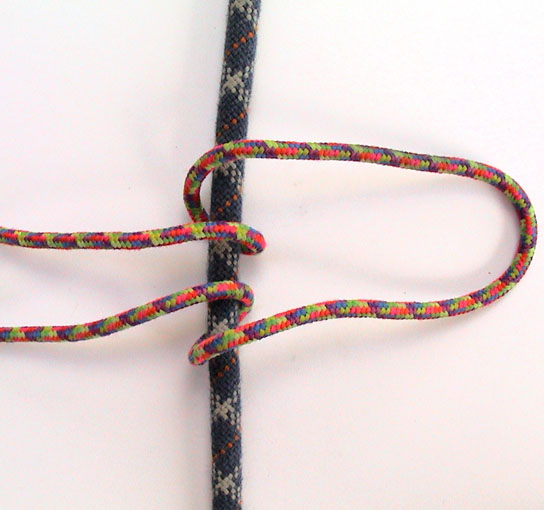
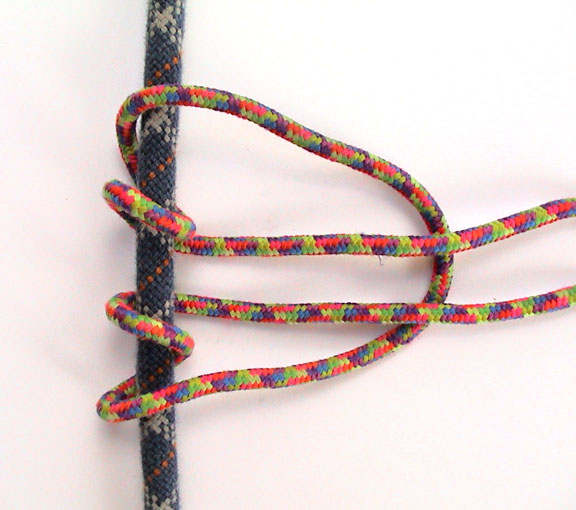
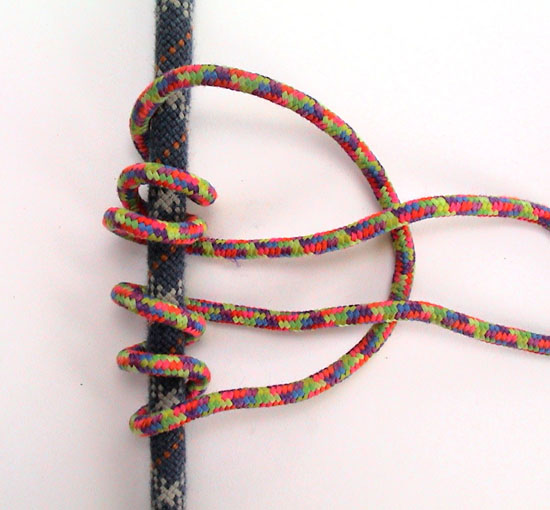
As you can see you simply wrap the loop of cord around the
rope going through the inside of each previous wrap. The more wraps the
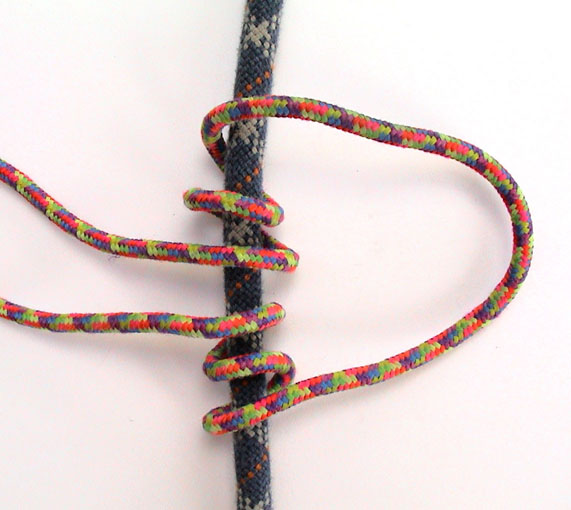
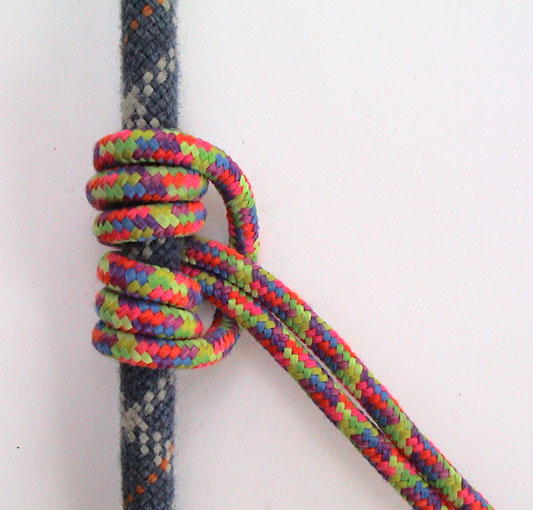
"grippier" the knot. Three wraps is generally enough. Step
6: Pull the knot tight, neaten up the wraps and use the tail loop to clip
into. Leaving the knot a little loose it can be slid up and down the rope.
Weight the knot and it will grab the rope and lock off. Note: this form of
prusik knot can sometimes be difficult to loosen once it has been tightened by the
weight of a climber.
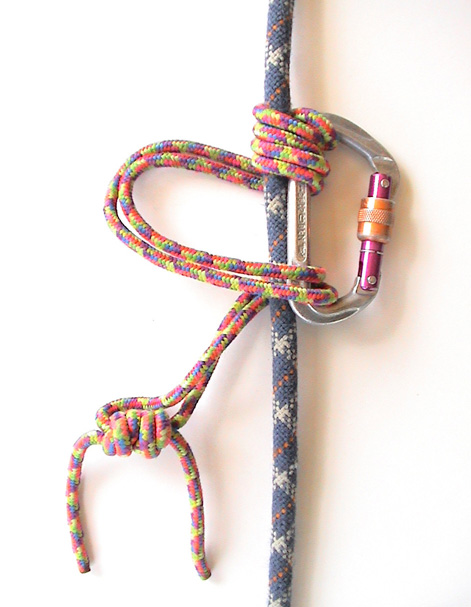
The "Klemheist"
and "AutoBlock" Knot
The difference with the Klemheist (also called "Machard", or
"French Prusik") compared to the normal
Prusik is that it can be moved once weighted and will work with webbing as
well as cord. This can be very handy in
certain situations. Follow these steps to tie a Klemheist:
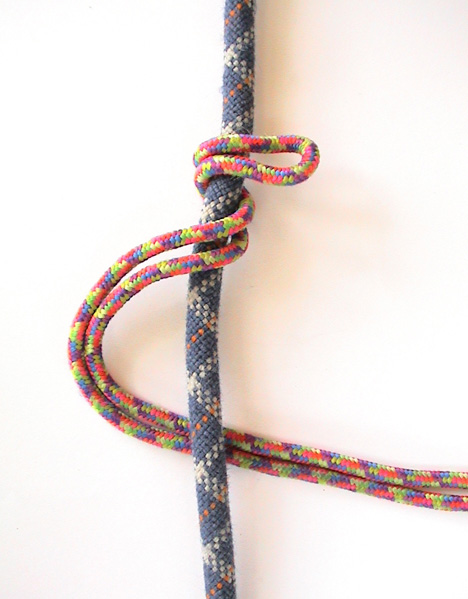
Step 1: Simply
wrap a loop of cord around the rope several times. Step 2: Feed the
bottom
tail through the top tail and clip bottom tail with your load.
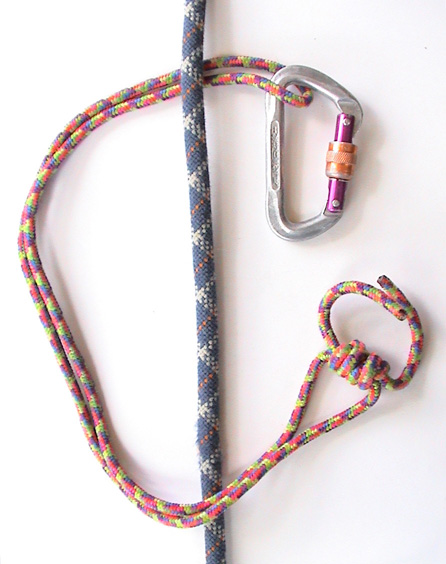
The "Autoblock" is essentially the same knot as the Klemheist, except that in the last step you simply clip both tails together with a carabiner, rather than feeding one through the other.
The Bachman Knot
This knot makes use of a carabiner as a handle to ease shifting the
knot up and down the rope. Note if you pull down on the carabiner, it will
unlock the knot, moving it downwards. Likewise yank the carabiner upwards
to shift it in that direction. This knot is not so good on icy ropes.
Follow these steps to tie a Bachman knot:
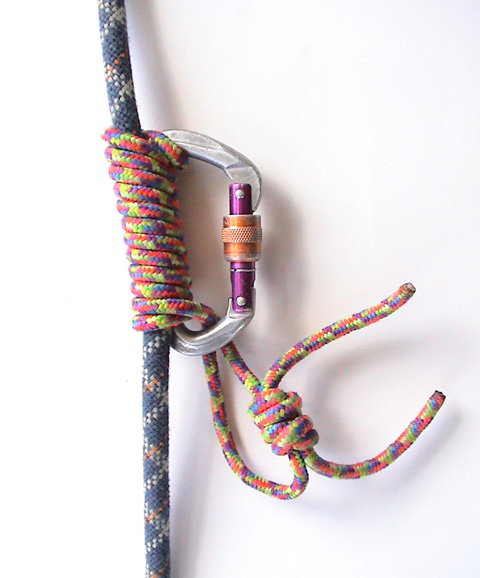
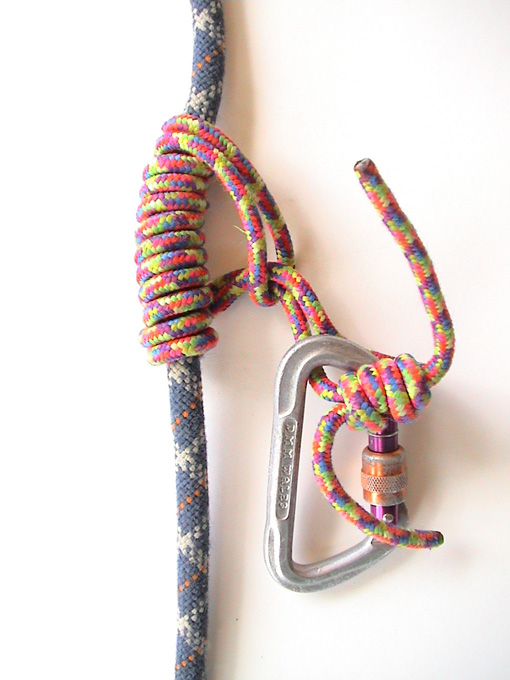
Steps 1 & 2: Clip your loop of cord
through a carabiner and begin wrapping the cord around the rope, feeding
it through the carabiner with each pass. Keep the wraps nice and
snug. Step 3: Allow the tail of the cord to hang down (as
pictured), and clip your load to this protruding tail. Do not clip your
load to the carabiner functioning as the "handle".
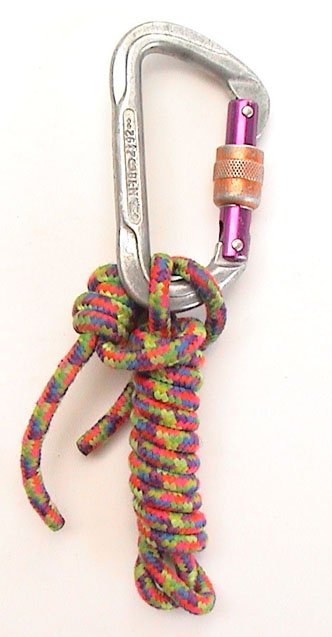
One Method Of
Racking Your Accessory Cord
Here's one way to rack your prusik cords so that they have a small profile
on your harness gear loops. Simply twist the cord about it self. Follow
theses steps:
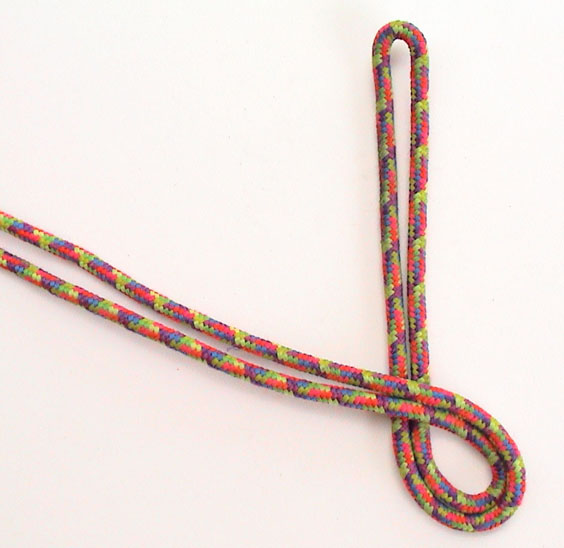
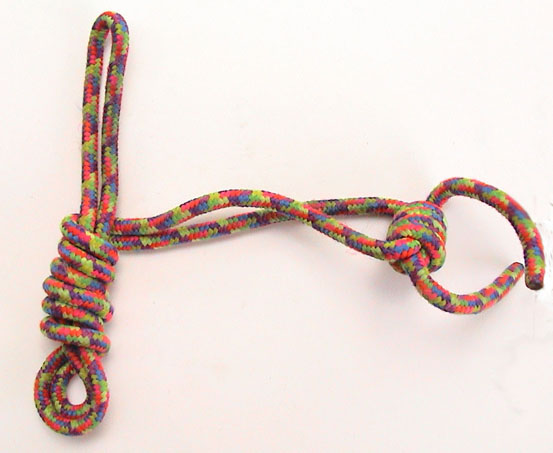
When you need to deploy the cord, a quick shake will work out the
kinks.
Further Reading:
Prusik
Knot - Explanation of how to tie from Tom's Sydney Canyoning site.
Prusik Knot
- From from Geoff Kuenning's web site.
Autoblock
- Backing up an abseil. From rockclimbing.com web site.
Home | Guide | Gallery | Tech Tips | Articles | Reviews | Dictionary | Forum | Links | About | Search
Chockstone Photography | Landscape Photography Australia | Australian Landscape Photography
Please read the full disclaimer before using any information contained on these pages.
All text, images and video on this site are copyright. Unauthorised use is strictly prohibited.
No claim is made about the suitability of the information on this site, for any purpose, either stated or implied. By reading the information on this site, you accept full responsibility for it's use, and any consequences of that use.