![]()
Sponsored By
ROCK
HARDWARE
| Beechworth Bouldering
Circuit [ Images | Guide (Doc) ] |
|
||||||||||||||||||||||||
 By
Paul Martin
By
Paul Martin
Beechworth; 30 minutes drive from Wodonga in north
eastern Victoria is a true heritage town with many listed buildings and
historical artifacts dating back to the gold rush era. It is a must see
for anyone visiting the north east region with a multitude of
fascinating shops and tourist attractions.
From a climber’s perspective, the Beechworth area is also worth spending
some time in as it is blessed with a large number of granite boulders
upon which we may ply our trade.
The bouldering in this guide covers only a small but popular area which
lies within close proximity to the town centre and follows the tourist
drive “Gorge Road” around the Spring Creek Gorge passing many boulders
along the way. I have only described the climbing between the start of
Gorge Road (when entering Beechworth from Wodonga or Chiltern) and
Spring Creek, and of that area I have only described the more worthwhile
problems.
Many other problems exist and most of the obvious lines have been done.
The best problems are to be found in the small quarries and along Spring
Creek itself.
Route Descriptions. All boulders/areas have been given a letter on the
map. This letter then corresponds with the problem number(s), photo(s)
and description.
When to go. A visit between spring and autumn is recommended but ensure
you miss the hot days. A sunny winter's day is also nice with the
friction being superb. Ensure it hasn't rained in the last few days if
you intend on bouldering in Spring Creek as most of the problems will be
closer to the water, making access harder and the landings more
slippery.
Grades. All problems are graded using the 'V' grading scale, basically
the larger the number the harder the problem. Most landings here are ok,
however a crash pad is always a good idea, and always make sure someone
is spotting you.
Terms and Abbreviations ![]()
N: North
E: East
S: South
W: West
River Right: The right hand side of any river/creek, as you look
downstream.
River Left: The left-hand side of any river/creek, as you look
downstream.
Logistics ![]()
From Melbourne. Drive towards Sydney along the Hume Freeway until you
get to the Chiltern/Beechworth turnoff. From here head towards
Beechworth. Turn right after Woolshed Falls and the turn off for Gorge
Road is immediately after the 60km sign on your right.
From Sydney/Albury/Wodonga – option 1. Drive towards Melbourne along the
Hume Freeway until you get to the Chiltern/Beechworth turnoff. From here
head towards Beechworth. Turn right after Woolshed Falls and the turn
off for Gorge Road is immediately after the 60km sign on your right.
From Sydney/Albury/Wodonga – option 2. Start on Wodonga’s High Street,
go straight through the large roundabout at the water tower and continue
along Beechworth Road, heading for Beechworth. The turn off for Gorge
Road is immediately after the 60km sign on your right upon entering
Beechworth.
Note that the Gorge Road is one way only.
Thanks goes to Jason Owen, John Lewis, Nick Danne and Rick Webb, who
with their eagerness, infectious attitudes and strong fingers have
helped establish these great problems over the years.
There are essentially 2 separate areas on this
circuit. The Gorge Drive Boulders and Spring Creek. The Gorge Drive
Boulders are to found between the start of Gorge Road and the Spring
Creek bridge.

Gorge Drive Boulders and Areas ![]()
A. The first problems are encountered in a small quarry which
lies on your right soon after entering the Gorge Drive. These can be a
bit chossy after winter.
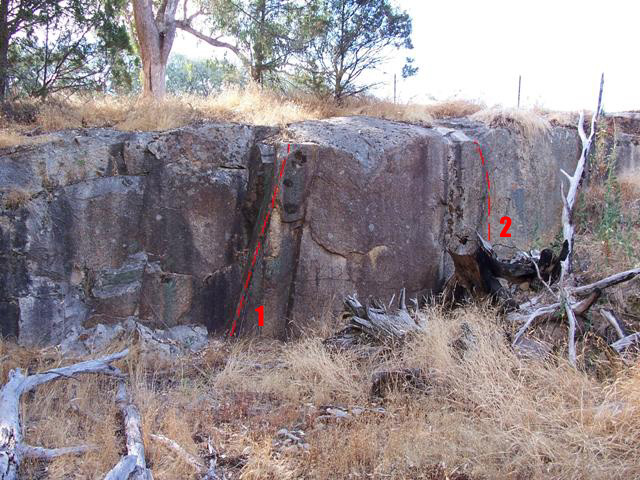
1. Un-named V4.
Up the arête avoiding the ledges on your left
2. Un-named V3.
Start at the dodgy flake and straight up, the hardest part is the
mantle!
B. Further along the road and past the Flat Rock Road junction is
a boulder with a hand crack facing the road.
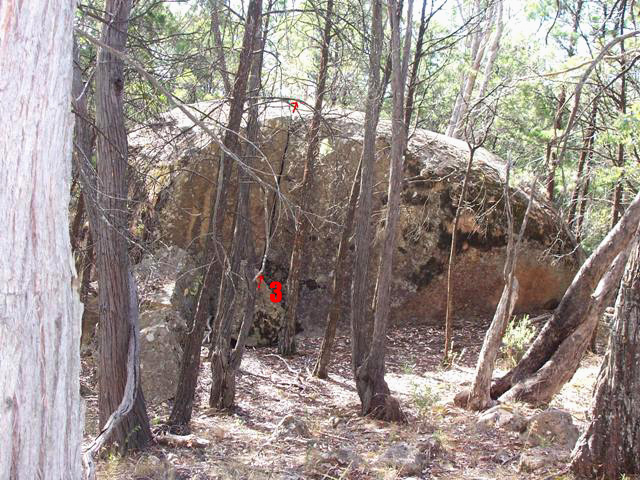
3. Bull Ant crack V0.
The obvious hand crack facing the road. Beware of its namesake in the
crack!
C. Park at the 1st lookout and walk down the
left (S) side of the slab for 20mtrs, this small quarry has 4 decent
problems.
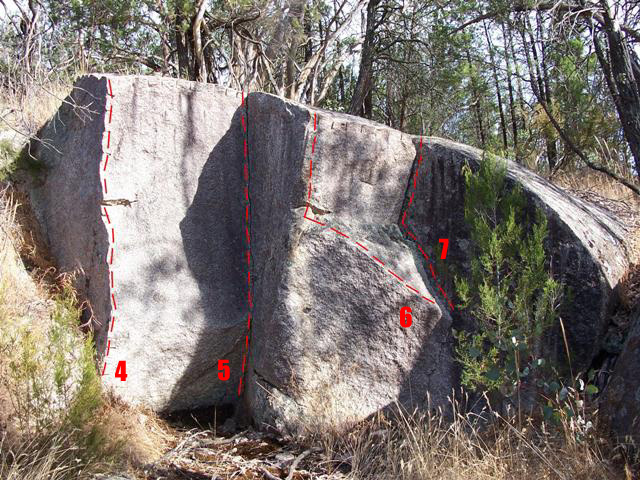
4. Un-named V0.
The left arête
5. Un-named V2.
The pinky fingers sized crack
6. Un-named V0.
The central arête. Start as for problem 7 and traverse in then up.
Beware the creaking hold on the arête.
7. Un-named V0.
The right hand corner.
D. Park at the Powder Magazine carpark and
walk up the path immediately opposite (NW) towards Ingram’s Rock. This
small quarry is at the top of the 1st ridge and on your right (E).
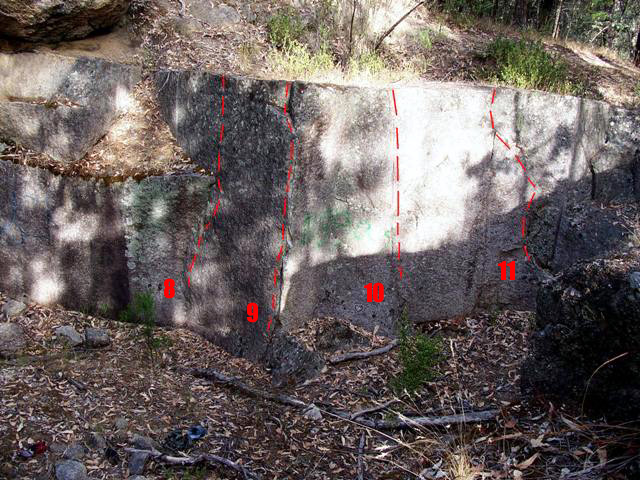
8. Un-named V0.
Climb to the edge/ledge and continue to the top via an easy mantle.
9. Un-named V0.
The central rib/arête makes a lovely easy problem.
10. Un-named V2.
Climb the shallow groove to the right of problem 9.
11. Un-named V0.
The ledges in the right hand corner make for an easy route up.
E. The next 2 problems can be found by walking across the walking
path in a westerly direction from the quarry mentioned above.
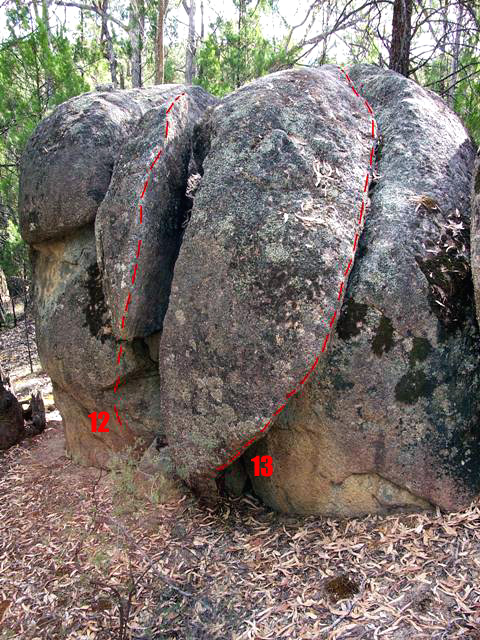
12. Un-named V0.
Stand start at the hanging flake and climb it.
13. Un-named V4.
Sit start at hanging flake where it almost touches the ground.
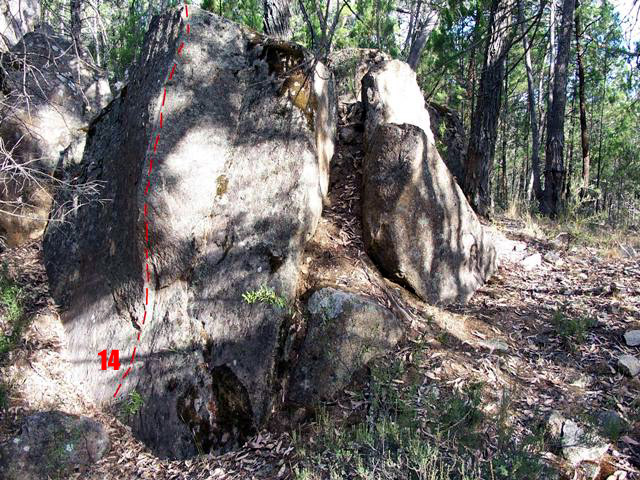
You will find the next quality problem by walking around the back of
problems 12 and 13. This thought provoking problem is in another small
quarry 20mtrs to the NW of the above problems.
14. Quarryman V4.
A stunning line. Delicate moves up the central arête/rib lead to a
committing top over.
F. Proceed down Gorge Road towards Spring Creek to find the
following boulders. You will pass a number of graffitied boulders; the
1st of which contains a highball hand crack, this is problem 15.

15. Un-named V5/26(?).
Often attempted, rarely topped out on! The highball hand crack is
usually top roped as the crux is right at the top.
G. Further down the Gorge Road is an overhanging boulder. Park in
the space and walk back up the road to the next 3 problems.
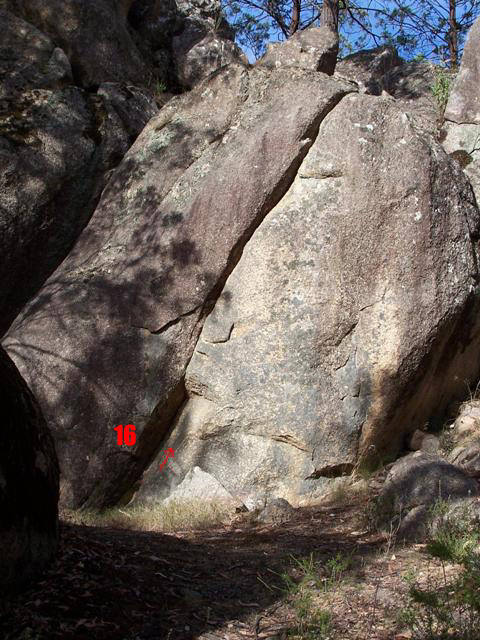

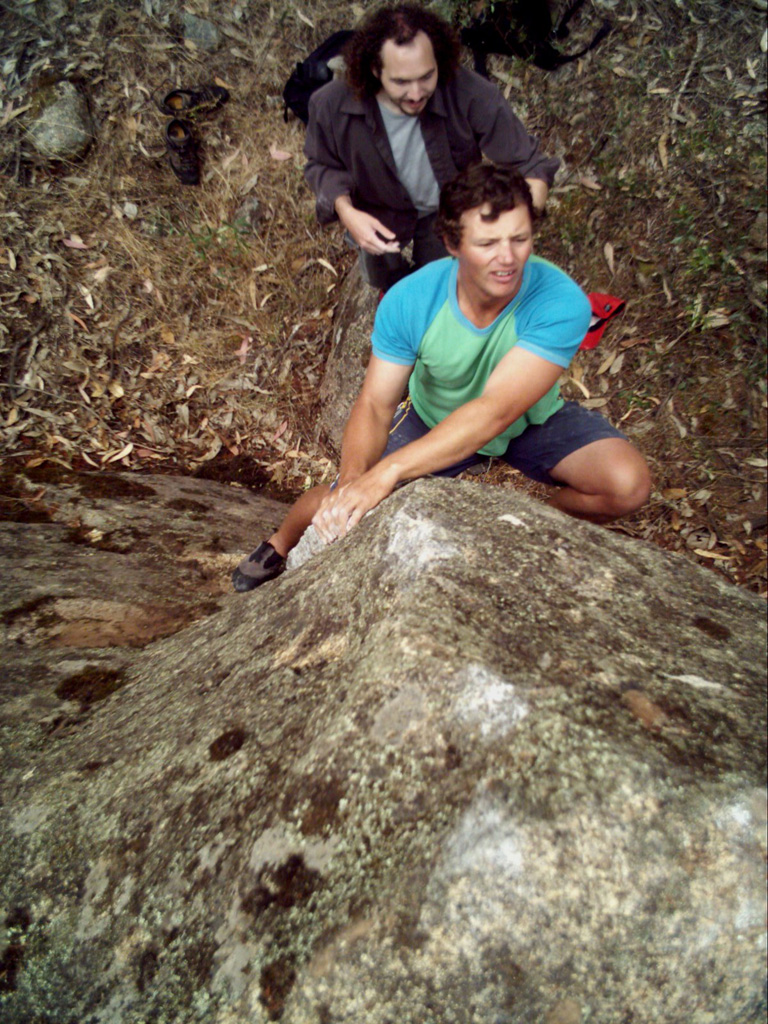
16. V0. Un-named
Easily visible from the road, this classic highball finger crack is a
stunning problem with the hardest moves saved for the finish.
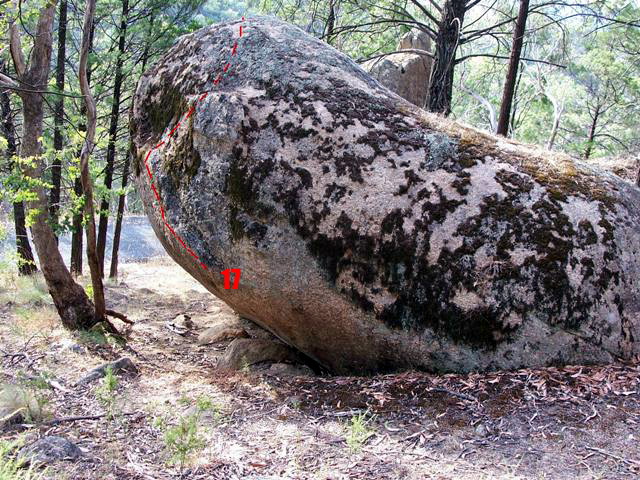
17. Roadkill V3.
A few nice moves on this overhung boulder’s face leads to a hard pull to
top out.
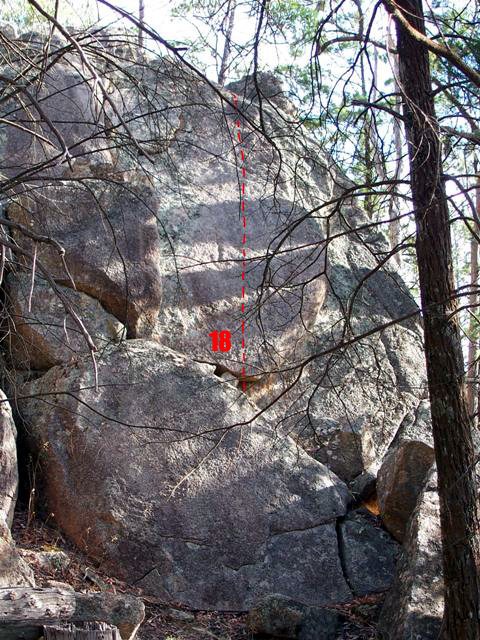
…now walk around the corner to the NW.
18. Un-named V0.
An old time easy classic up the slab.
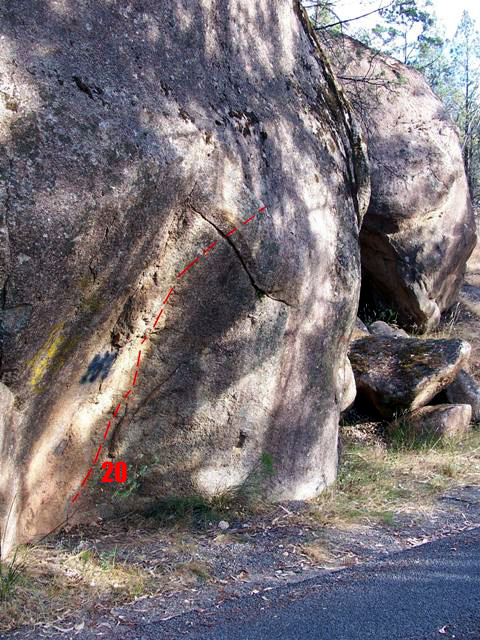
If you parked at the overhanging boulder you’ll easily see the following
2 problems.
19. Roadside sideshow V4.
Sit start at the slopers and up to the good dyke edges, head left and
step off when matched at the last big edge.
20. Project
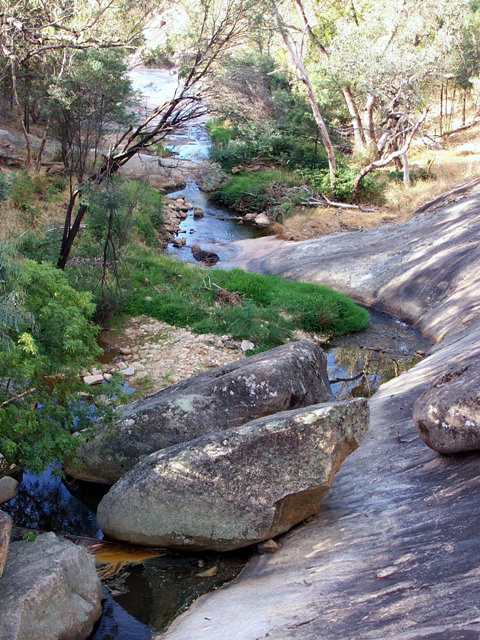
Spring Creek Boulders ![]()
H. As you cross the bridge, look down to your right and you can
see the 1st three problems on the boulders just downstream of the
bridge. Problems are listed from upstream to downstream (consult map)
and start on the downstream side of the bridge. Park on the (W) side of
the bridge and access the 1st problems by following the trail that
starts just (W) of the bridge with some easy boulder hopping down to the
creek.
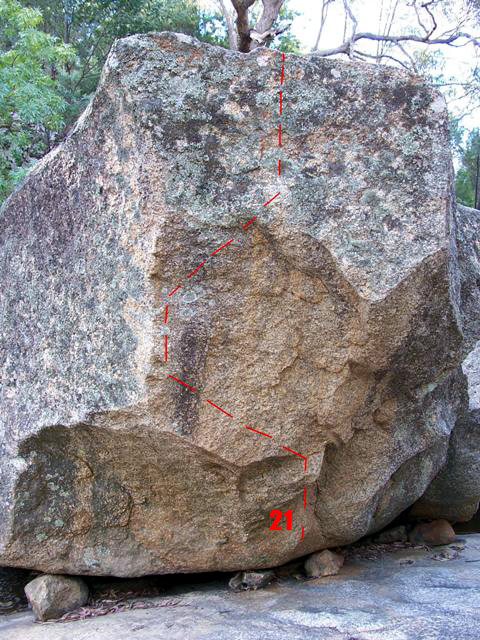
21. Bayou Baby. V6
Classic! This is the 1st boulder on river right about 50 metres
downstream from the bridge and ascends the stepped overhung orange face.
Sit start using the chockstone for feet and pull hard off dual side
pulls to get off the ground. NB: A variant has been climbed without
using the chockstone (V8).
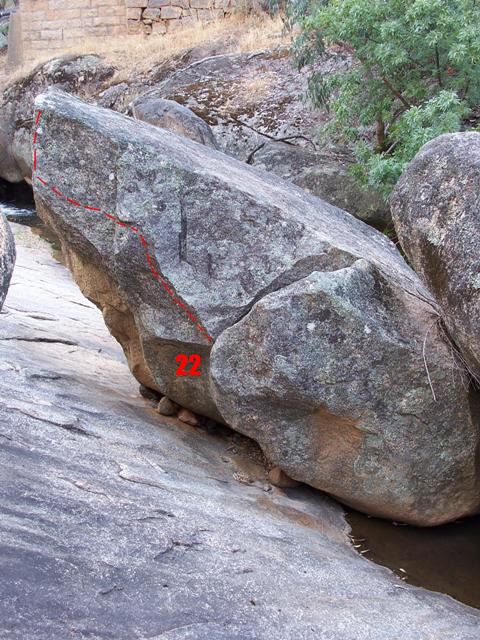
22. The Nymph. V3
Sit start in finger crack on the downstream side of BB. Up on slopers,
heading left up the vague arête to join BB at the top and pull over.
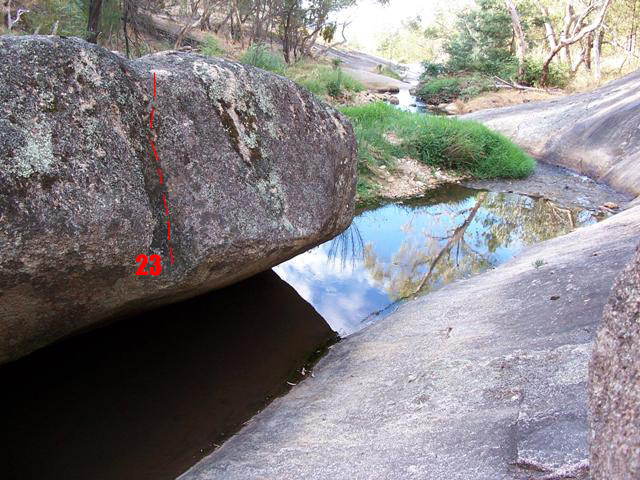
23. Caddis. V7
Thought provoking! The next boulder just downstream from TN has a single
big jug on its lower lip. Start matched in the big jug, pull up and over
with much technicality.
I. You'll find the next problems by following
the creek down to the large waterfall and pool. Sunset Strip takes the
orange slab to the W (river left) of the waterfall.
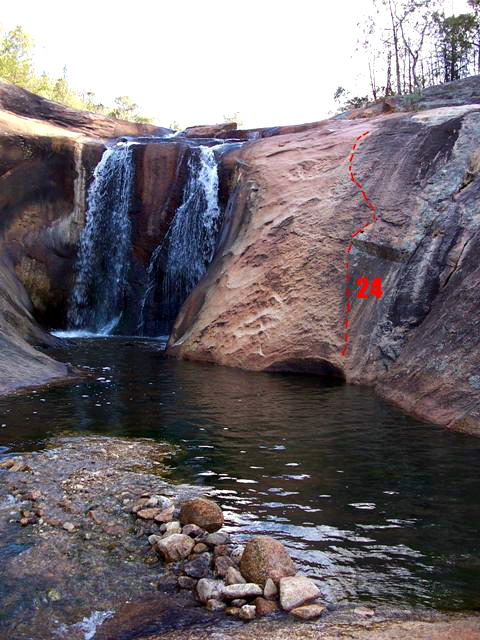
24. Sunset Strip. V0
An extremely photogenic problem providing eerie climbing in a great
position. Traverse into the bottom of the corner crack at the base of
the pool, step left to gain the wall proper, up to little block, left
around this, take a deep breath and head diagonally up left to the top,
following the orange rock. (Not the black streak!).
J. Cross over and walk downstream on river
right of the creek until you get to the next big waterfall and see a
large boulder which juts out into the creek. “A Little Ray of Sunshine”
starts on the left hand (W) end of the boulder's upstream face and just
to the right of the nice looking arete with the big sloping jug.
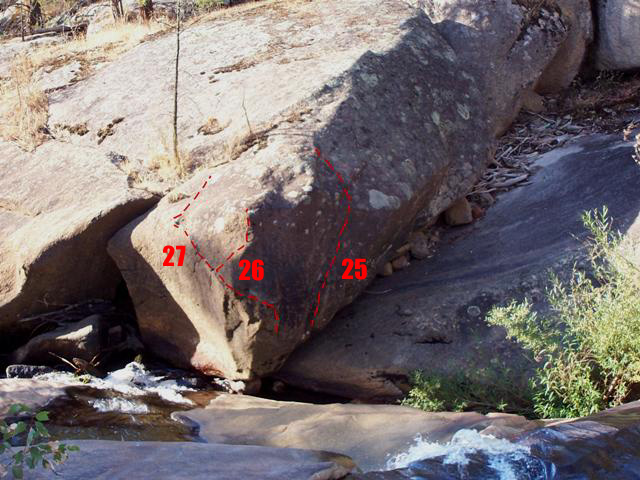
25. A Little Ray of Sunshine. V5
A striking and powerful line on very smooth overhung rock. Start matched
on sloping hold/jug. Head diagonally right and up, top out.
26. Flotsam. V3
Start at largest low hold on arête and straight up to top out…easier
than it first appears when using the full array of holds.
27. Project
Start as for ‘Flotsam’. Take a deep breath and traverse left across the
lip to the big flat top to a mildly terrifying pull over.
Cross back to river left of the creek and follow it downstream passing
many rapids and small waterfalls, passing problem 28 on the way. “Sink
or swim” is on the boulder about 100 metres from the end of the
waterfalls.
These boulders are not shown as photo topos.
28. Puddles. V0+
Scary slabbing. Starts behind the cypress pines in the small ‘cove’ on
river left. Straight up the clean black streak.
29. Sink or swim. V0
The small boulder in the centre of the creek provides a good problem if
the start isn’t underwater! Sit start on the obvious big flat top on the
river left side of the boulder; follow the line of holds to the top.
From here, simply follow the Gorge Road back to Beechworth. There is a
plethora of large boulders and smaller cliffs along this section of
road. Many boulder problems and top rope routes have been done here but
have not been noted due to their low quality.
Home | Guide | Gallery | Tech Tips | Articles | Reviews | Dictionary | Forum | Links | About | Search
Chockstone Photography | Landscape Photography Australia | Australian Landscape Photography
Please read the full disclaimer before using any information contained on these pages.
All text, images and video on this site are copyright. Unauthorised use is strictly prohibited.